
Mar 30, 2026
A Guide to Stripe Embed Checkout in Bubble
Learn how to integrate Stripe Embed Checkout in your Bubble app. A step-by-step guide on API setup, webhook configuration, and handling no-code payments.

When you're ready to add payments to your Bubble app, the first big question isn't how to build, but what to build with. Your choice between Stripe’s prebuilt Checkout and its customizable Elements is one of those early decisions that will have a big impact on your development time and user experience.
For most founders, especially if you're building an MVP, I'm here to tell you that the Stripe embed checkout is almost always the right call. It's the fastest, most reliable path to getting paid.
Stripe Checkout vs. Elements: Which Is Right for You?
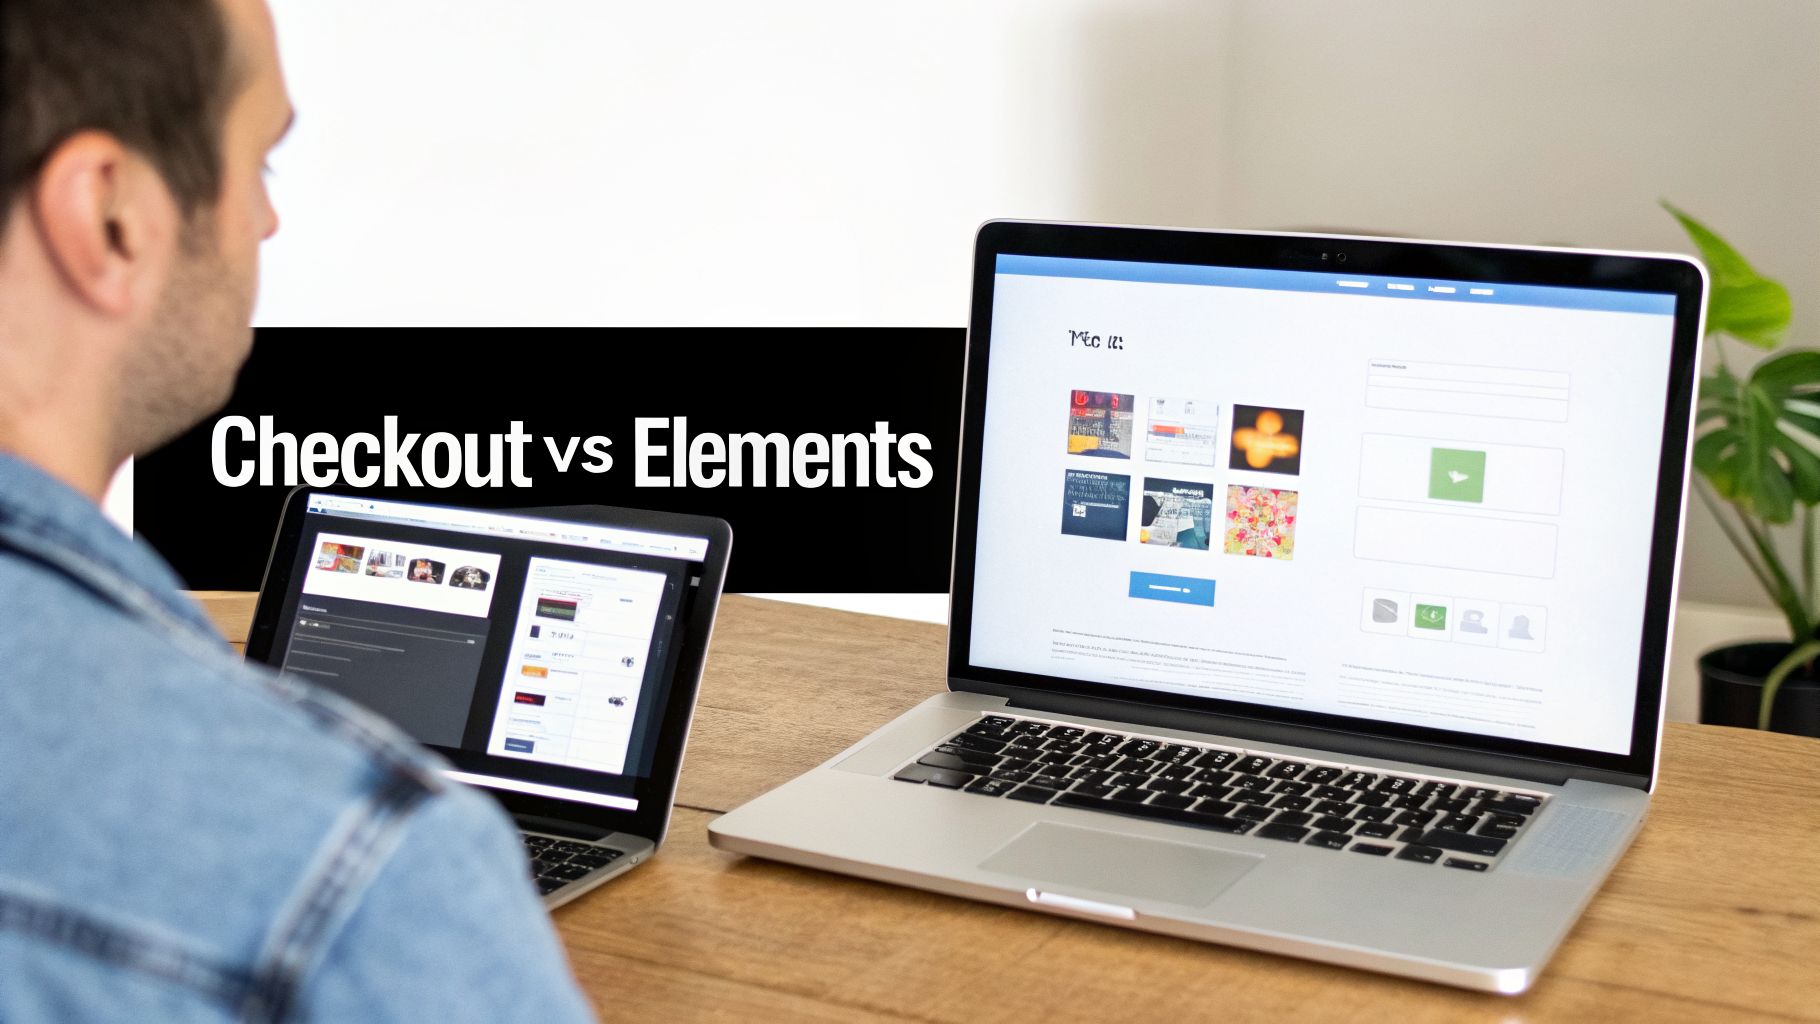
When you're building on Bubble, you're constantly weighing speed against control. This is exactly the trade-off you face when choosing between Stripe Checkout and Stripe Elements.
To help you decide, here’s a quick breakdown of what you're really choosing between.
Stripe Checkout vs. Stripe Elements: A Quick Comparison for Bubble Builders
This table gives you a high-level look at the two paths. It's designed to help you quickly figure out which integration method makes the most sense for your project right now.
Feature | Stripe Embed Checkout | Stripe Elements |
|---|---|---|
Speed & Simplicity | Very High. Redirect to a pre-made page. Minimal setup. | Low. Requires building a custom UI and complex workflows. |
Design Control | Low. Limited to branding (logo, colors). | Total Control. Build your form to match your brand exactly. |
Conversion Features | Built-in. Includes Apple/Google Pay, saved cards, etc. | Manual. You must build and enable these features yourself. |
Security (PCI) | Easiest Compliance. Handled entirely by Stripe's page. | More Responsibility. You handle more of the compliance scope. |
Best For | MVPs, founders, and teams focused on speed to market. | Mature products with dedicated dev teams and specific UX needs. |
As you can see, Stripe Checkout is built for speed and efficiency, while Elements are for those who need pixel-perfect control and have the resources to build it.
Why Stripe Embed Checkout Wins for MVPs
Having worked with countless founders at Codeless Coach, I can say with confidence: start with the Stripe embed checkout. The number one reason is getting to market fast. You can set up the prebuilt checkout in a tiny fraction of the time it would take to build a custom payment form using Elements.
This isn't just about saving a few hours of development. It’s about sidestepping a ton of common headaches that can completely derail your launch.
Building a payment form from the ground up, even in Bubble, opens a can of worms:
State Management: Juggling loading indicators, error messages, and input validation with custom states in Bubble can quickly turn into a spaghetti-like mess of workflows.
Responsiveness: Getting a custom form to look and work perfectly on every single screen size is a major design and testing challenge.
Security & Compliance: While Elements themselves are secure, using Stripe’s hosted Checkout page means you inherit its PCI compliance right out of the box. This offloads a massive security burden.
The goal of an MVP is to test your core idea with real, paying customers as quickly as possible. Stripe’s embedded checkout gets you there faster, so you can focus on what makes your product unique, not on reinventing the payment form.
The Power of Optimized Defaults
Choosing Stripe Checkout isn't just a shortcut; it's a strategic move. You're tapping into a system that Stripe has spent millions of dollars perfecting. This has a direct impact on your checkout optimization and bottom line.
Think about it—features like saved cards, address auto-completion, and local payment methods like Apple Pay and Google Pay are all baked in. You get all of this without any extra work.
The data backs this up. Stripe's own research shows that enabling digital wallets can boost conversion by 22% or more. Just look at Turo, the car-sharing marketplace. They captured an extra $114 million in yearly revenue after they switched to Stripe's optimized checkout. By using the prebuilt page, you get to benefit from that same world-class engineering.
While the total design freedom of Elements is tempting, it's often a premature optimization that leads to delays and unnecessary complexity. Save that level of customization for when your product has found its market and you have the resources to invest in a fully custom experience. For now, speed and reliability are your greatest allies.
How to Configure Your Stripe Dashboard
Before we even touch the Bubble editor, we need to get your Stripe account set up correctly. Think of the Stripe Dashboard as the command center for your payments. Getting this foundation right from the beginning will save you a world of headaches down the road.
First things first: if you haven't already, you need to complete the Stripe account signup process and get your business fully verified. You won't be able to accept live payments until this is done, so it's a non-negotiable first step.
Finding and Securing Your API Keys
With your account active, it's time to grab the two crucial pieces of information that connect Stripe to your Bubble app: the API keys.
You'll find these keys by navigating to Developers > API keys in your Stripe Dashboard.
Stripe gives you two different types of keys, and it's critical to understand the difference:
Publishable Key: This one is intended for client-side use, meaning it's okay for it to be visible in the user's browser.
Secret Key: This is the important one. It's used for server-side actions and must be kept completely secret. Never, ever expose this key on your front-end or in any public code.
In Bubble, you'll want to paste this Secret Key into the "private keys" area of your plugin settings or the API Connector. This keeps it secure and out of sight from prying eyes.
Pro Tip: Always start building with your Test Keys. Stripe’s test mode is fantastic; it lets you run through your entire checkout flow using fake card numbers without any real money changing hands. You can flip the switch between "Test mode" and "Live mode" right at the top of your dashboard.
Creating Your Products and Prices
Next up, we need to tell Stripe what you're actually selling. A common mistake is to hard-code product names and prices directly into your Bubble app. A much better practice, especially for a clean stripe embed checkout, is to define everything inside Stripe’s "Product catalog."
This approach decouples your pricing from your app's code. Need to change a subscription price or add a new tier? You can do it right in Stripe without having to push a new deployment for your Bubble app. It’s a game-changer for staying agile.
When you create a price, you'll have two main options:
One-time: Perfect for single purchases, like an ebook or a one-off consulting session.
Recurring: The go-to for subscriptions. You can set the billing cycle (monthly, yearly, etc.) for things like a SaaS plan or a community membership.
Every price you create will get a unique ID that looks something like price_1P.... This is the identifier you’ll use in your Bubble workflows to tell Stripe exactly what the user wants to buy. This small bit of setup is what makes your entire payment system scalable and easy to manage.
Connecting Bubble and Stripe with the API Connector
While plugins offer a tempting shortcut, the real power for a scalable Stripe integration lies in Bubble’s own API Connector. It's the difference between a pre-packaged meal and cooking from scratch—one is fast, but the other gives you complete control over the ingredients and the final result.
We're going to build the single most important API call for an embedded checkout: creating the Checkout Session. This is the server-side magic that generates the secure payment link for your user. Honestly, this is the exact spot where I see most builders get stuck, so we'll walk through it together, step by step.
Initial API Connector Setup
First things first, head over to the Plugins tab in your Bubble editor. If you don't have the API Connector installed yet, go ahead and add it. Once it's ready, click "Add another API" and give it a memorable name like "Stripe - Custom." This will be the home for all your custom Stripe calls.
Before we do anything else, we need to handle authentication. Setting this up at the API level means you only have to do it once.
Authentication: Choose "Private key in header."
Key name: Type
Authorization.Key value: Enter
Bearerfollowed immediately by your Stripe Secret Key (the one starting withsk_test_...).
Heads up! That space after "Bearer" is absolutely critical. It's a tiny detail that can cause a lot of headaches if you miss it.
If you need a refresher on finding your keys or understanding the difference between public and secret keys, check out our detailed guide on handling Stripe API keys. Getting this right is fundamental to keeping your integration secure.
Crafting the Create Checkout Session Call
With authentication handled, we can now build the actual API call. Click "Add another call" under your new Stripe API and name it something descriptive, like "Create a Checkout Session." This call is what tells Stripe what the user is buying and where to send them after they pay.
Here’s the configuration you'll need:
Use as: Set this to Action. This is crucial because it lets you trigger the call from a Bubble workflow, like when a user clicks a "Buy Now" button.
Data type: JSON is the correct choice here.
Method: We're creating a new object in Stripe, so we'll use POST.
URL: This is the Stripe endpoint we need:
https://api.stripe.com/v1/checkout/sessions.
The real work happens in the JSON body. This is the set of instructions you send to Stripe. Here's a basic template to get you started:
{
"line_items": [
{
"price": "",
"quantity": 1
}
],
"mode": "payment",
"success_url": "https://your-app-name.bubbleapps.io/success?session_id={CHECKOUT_SESSION_ID}", "cancel_url": "https://your-app-name.bubbleapps.io/cancel" }
Pro Tip: Look closely at that
success_url. The{CHECKOUT_SESSION_ID}part is a special variable from Stripe. It automatically attaches the unique ID of the checkout session to the URL when it redirects the user. This is non-negotiable for verifying the purchase on your end.
To make this call truly useful, you need to make the price_id dynamic. In the API Connector settings, just uncheck the "Private" box next to the price_id value. This exposes it as a field in your workflow action, so you can dynamically pass in the correct Price ID from your database for whatever product the user wants to buy.
By setting up this direct connection, you’re plugging your Bubble app into an incredibly robust financial engine. Stripe is projected to handle over $1.4 trillion in 2026 and already processes more than 500 million API requests daily. For a founder, building on this kind of infrastructure means you're ready for growth from day one to day one million.
With this call initialized, you’re all set to start triggering payments right from your app's user interface.
Triggering Payments and Handling Redirects in Bubble
Now that your API call is configured, it's time for the fun part: making it all work. We need to connect the "Pay Now" button your user clicks on the front-end to the server-side magic that actually kicks off the payment. The goal here is a smooth, unbroken journey from a click to a completed purchase.
Let's start in your Bubble editor. You’ll want a clear call-to-action button, something like "Purchase" or "Checkout Now." This button is the trigger for the entire payment sequence. When a user clicks it, we'll fire a workflow that we build on the back end.
Initiating the Checkout Session Securely
When that "Pay Now" button is clicked, it needs to run a workflow. This is where you'll finally use the "Create a Checkout Session" API call we just set up. But there's a crucial detail here: this action must be a backend workflow.
Why the fuss? It's all about security. Running this on the server side is the only way to keep your Stripe Secret Key completely private. If you were to run this as a regular, client-side action, your secret key would be exposed in the user's browser—a massive security hole waiting to be exploited. Bubble's backend workflows are designed specifically for this, ensuring these sensitive tasks happen safely on your server, far from anyone else's view.
Inside your new backend workflow, the process looks like this:
Add an action to trigger the "Create a Checkout Session" API call.
Make sure you're passing the dynamic
price_idfor the specific product the user wants to buy.The API call will return a bunch of data. You need to save the result, which contains the checkout session
idand, most importantly, theurl.
Pro Tip: I always make it a habit to save the checkout session
idto a temporary field on the User or a dedicated 'Cart' data type. This lets you track the session before the payment is finished, which is incredibly helpful for debugging if something goes wrong.
Managing Redirects for Success and Cancellation
Once your backend workflow runs and Stripe creates the Checkout Session, it hands back a unique URL. Your next job is to send the user to that URL. In Bubble, this is handled perfectly by the "Open an external website" action.
You'll set this action up to use the url you got back from the API call in the previous step. This will instantly redirect the user to the secure, Stripe-hosted embed checkout page. This is where they'll enter their card details and confirm the payment.
While setting this up, you also need to think about where users go after they interact with Stripe's page. You'll need to design two simple but essential pages in your Bubble app builder:
Success Page: This is where users land after a successful payment. It should have a clear "Thank You" or "Order Confirmed" message. Later on, this is where you'll verify the purchase actually went through.
Cancel Page: If a user clicks the back button or abandons the checkout, they'll be sent here. It’s a much better experience than a broken page, giving them an easy way to get back to your site.
These are the same success_url and cancel_url pages you defined in the JSON body of your API call. Nailing this redirect flow is a small detail that makes a huge difference in user experience and prevents the kind of confusion that costs you sales.
Confirming Payments Reliably with Stripe Webhooks
Relying solely on a redirect to your /success page after a payment is one of the most common—and dangerous—mistakes you can make in your Bubble app. I've seen it cause countless headaches for founders. A user might close their browser tab a second too early, their internet could drop, or a mobile browser might crash. When that happens, your app never gets the confirmation, leaving the user charged but without access to the product they just paid for. That's a support nightmare waiting to happen.
The only truly bulletproof solution is to use Stripe Webhooks. Think of webhooks as automated messages Stripe sends directly to your application's backend to confirm that something important, like a payment, has officially happened. This communication happens server-to-server, completely independent of the user's browser, guaranteeing your database stays perfectly in sync with what’s actually going on in Stripe.
Why Webhooks Are Non-Negotiable
A webhook is Stripe’s official messenger. It's the system of record that tells your Bubble app, "Hey, the payment for checkout session cs_test_... was successful." Without this definitive message, your app is just guessing based on whether the user landed on a specific page. By setting up a webhook, you create a reliable, behind-the-scenes channel that confirms every transaction with 100% accuracy.
From the user's perspective, the flow seems simple: they click pay, get redirected by Stripe, and see a success page.
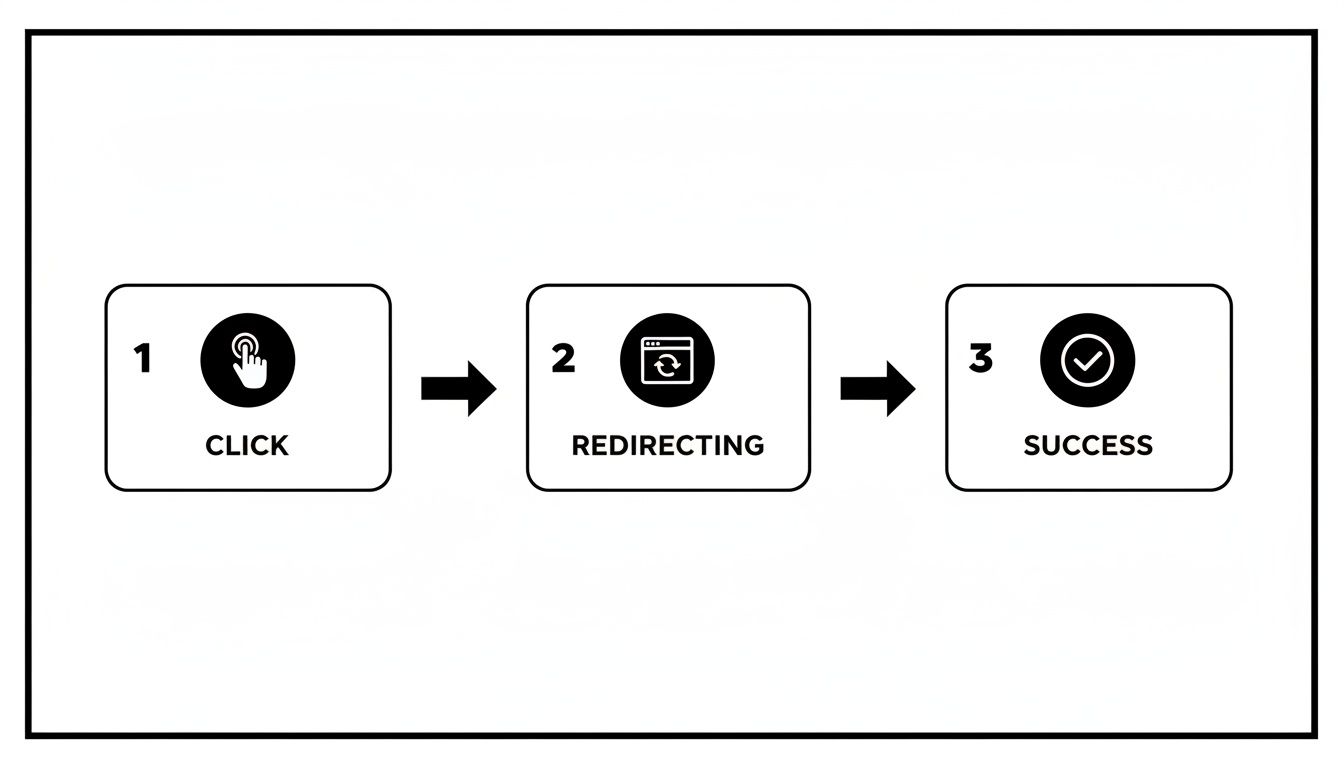
This is what the user sees, but the really critical part—the webhook event—happens invisibly in the background right after Stripe confirms the payment. It’s this invisible step that makes your application’s logic robust.
On top of this, you’re also getting the benefit of Stripe’s massive infrastructure. Tools like Stripe Radar, their built-in fraud prevention system, are automatically screening your transactions. This means your stripe embed checkout is protected by enterprise-grade security without you writing a single line of security code.
Setting Up Your Webhook Endpoint in Bubble
To start receiving these crucial messages, you need to create a "listener" in your app. In the world of Bubble, this is done with a Backend Workflow.
First, pop over to the Backend Workflows section of your Bubble editor.
Click to add a new API workflow. Give it a clear, memorable name like
stripe_webhook_listener.You absolutely must check the box for "Expose as a public API workflow." This is what generates the unique URL that you’ll need to give to Stripe.
Next, you have to teach Bubble what kind of data to expect from Stripe.
Look for the "Detect request data" section and click the "Detect data" button. Bubble will open a small window and wait patiently to receive a sample message from Stripe. This is how it learns the structure of the incoming data.
My Pro Tip: Leave this detection window open in your Bubble editor and immediately switch over to your Stripe Dashboard. You're going to send a test event from Stripe directly to this new URL. This one-time setup is how Bubble learns the 'shape' of the data for an event like
checkout.session.completed, so it knows how to handle it in the future.
With Bubble listening, go to your Stripe Dashboard. Head to Developers > Webhooks and click "Add an endpoint." Paste the URL from your Bubble workflow into the "Endpoint URL" field. When asked which events to listen for, you can start by selecting checkout.session.completed.
After you create the endpoint, use Stripe's "Send test webhook" feature right away. This will fire off that sample data Bubble is waiting for. Once Bubble receives it, it will map out all the data fields, and your workflow will be ready to process live payment confirmations.
If you get stuck trying to connect the dots, getting an expert eye on it can save you hours of frustration. We offer dedicated Bubble.io support at Codeless Coach for exactly these kinds of tricky integrations.
Common Questions About Stripe and Bubble
When you're hooking up Stripe and Bubble, a few common questions always pop up. It's completely normal—getting payments right is critical. Let's walk through some of the things I see developers get stuck on most often when implementing a stripe embed checkout.
A big one is currency. How do you handle payments from all over the world? The good news is, you mostly don't have to. Stripe does the heavy lifting here. When you set up a product in your Stripe Dashboard, you assign it a currency (like USD or EUR). From there, Stripe's checkout can often localize the price for your international customers, making for a much smoother buying experience.
Handling Failed Payments And Subscriptions
"What happens if a customer's card is declined?" This is another question I hear all the time. With Stripe's embedded checkout, a clear error message appears right on the payment form. The user can just enter a different card without ever leaving your site. It’s a huge win compared to building a custom form where you’d have to account for every single error state yourself.
For subscriptions, Stripe’s automation is a real game-changer.
Dunning: Stripe has a built-in process for automatically retrying failed subscription payments. You can configure how many times and how often it tries.
Notifications: It can also send automated emails to customers asking them to update their payment method after a failed charge.
Cancellation: If all the retries fail, Stripe can be set to automatically cancel the subscription, preventing you from providing a service you're not being paid for.
Honestly, this built-in dunning management is a lifesaver. It saves you from building complex reminder workflows in Bubble and recovers revenue that might have otherwise been lost.
Can I Offer Discounts Or Trials
Absolutely, and the cleanest way to do this is directly inside Stripe. Don't try to calculate discounted prices in Bubble; it gets messy fast. Instead, create coupon codes or promotion codes right from your Stripe Dashboard.
From there, it's just a matter of enabling a promo code field on your checkout session. When a user enters a valid code, Stripe handles all the math, applies the discount, and your Bubble app simply gets confirmation of the final successful payment via webhooks. This approach keeps your app logic lean and lets Stripe manage the financial complexity.
We've covered some common hurdles, but every project has its own unique challenges. Here are a few more frequently asked questions I get from Bubble developers working with Stripe.
Frequently Asked Questions
Question | Answer |
|---|---|
Do I need the Bubble Stripe plugin, or should I use the API Connector? | For simple, one-off payments, the official Stripe plugin by Bubble can be faster. For more complex needs like subscriptions, dynamic pricing, or connecting to a Stripe account, setting up calls with the API Connector gives you far more control and flexibility. |
How do I know a payment was successful? | You should always use webhooks. After a payment succeeds, Stripe sends a |
Can I customize the look of the embedded checkout? | You have some control. In your Stripe Dashboard settings, you can customize the colors, fonts, and logo to match your brand. However, the overall layout is fixed by Stripe to ensure security and optimize conversion. |
Is it safe to store Stripe keys in Bubble? | Yes, but you must be careful. Your Secret Key should only be stored in the "private" key section in the API Connector or plugin settings and marked as "private" in your backend workflows. Never expose your Secret Key on the front end. |
Hopefully, these answers give you a clearer path forward. The key is letting each platform do what it does best—Bubble for the app logic and Stripe for the payment processing.
Ready to stop wrestling with technical roadblocks and start building your app? At Codeless Coach, we provide one-on-one, expert guidance to help you master Bubble and launch your project faster. Book a session today and turn your idea into reality.


