
Apr 18, 2026
Google Map Search Box: A Bubble.io Founder's Guide
Learn how to add a Google Map search box to your Bubble.io app. A complete guide for non-technical founders on API keys, costs, plugins, and workflows.

You’re probably at the point where your Bubble app stopped feeling like a fun prototype and started asking for real product decisions.
A user needs to search for an address. Or choose a pickup point. Or save a service area. You add a map, drop in an input, and then Google throws a pile of terms at you: Maps JavaScript API, Places, billing, API restrictions, autocomplete, geocoding. For a non-technical founder, this is usually the moment the build slows down.
The good news is that the google map search box problem is very solvable in Bubble. The bad news is that there are a few decisions early on that affect cost, reliability, and how much pain you create for yourself later. Most tutorials only show the happy path. They don’t tell you when a plugin is worth paying for, when it becomes a trap, or how a badly configured search box can inadvertently waste API usage.
This guide is for that exact gap. The aim isn’t just to get a pin to appear on a map. It’s to help you build a search experience that fits an MVP, works inside Bubble workflows, and doesn’t surprise you with avoidable billing.
Your App Needs a Map So Now What
A common Bubble founder scenario goes like this. You’re building a marketplace, booking app, delivery flow, or internal ops tool. The app needs a location field, and you assume that means “add Google Maps.” Then you discover a map alone isn’t enough. Users don’t want to manually drag around a map. They want to type, pick, confirm, and move on.
That’s where the google map search box becomes the primary feature, not the map itself.
Google Maps launched in 2005, and the search box quickly became the center of the product experience. By 2007, Google had already expanded it with features like draggable viewports and info windows. Today, Google Maps processes billions of queries daily and powers over 70% of the world’s navigation applications, which is part of why users expect this pattern to feel instant and familiar in your app, according to Google Maps history on Wikipedia.
Most founders think they need “a map.” What they actually need is a reliable place search that feeds the rest of the app.
The practical difference matters. A map is visual. A search box is operational. It drives address capture, route planning, service eligibility, nearby search, lead qualification, delivery pricing, and record creation in your database.
What’s happening behind the scenes
When a user types into a location field, Bubble isn’t magically understanding addresses. One of two things is usually happening:
A plugin is wrapping Google functionality and giving you a cleaner no-code element.
Your API Connector is calling Google directly, then Bubble uses the response in workflows or custom states.
Both approaches can work. Both can also fail in expensive ways if you pick the wrong one for your stage.
What a working setup should do
For an MVP, I’d treat these as the minimum outcomes:
Search and suggest locations fast
Let the user select one clean result
Store the formatted address plus coordinates
Update the map with a marker
Pass that location into workflows elsewhere in the app
If your current setup only does item four, you’re halfway done. True value starts when the selected place becomes usable data.
Navigating Google Cloud for Your API Keys
Before Bubble can do anything useful, Google needs to know three things: what project this belongs to, what APIs you want to use, and who pays if the app starts getting traffic.

Google Cloud looks heavier than it is. For a Bubble founder, you can ignore most of it. You need a narrow setup, done carefully.
The minimum Google Cloud setup
Start by creating a fresh project in Google Cloud. Don’t dump this into an old experiment if you can avoid it. A clean project makes it easier to see usage and debug billing later.
Then enable the two APIs most Bubble search box builds need:
Maps JavaScript API for rendering the map in the browser
Places API for search suggestions and place selection
If you’re following a more custom route later, you may also touch related endpoints, but these two are the core.
After that, create an API key. Copy it somewhere safe, but don’t paste it blindly into Bubble and call it done.
Restrict the key before you forget
Founders often get lazy and regret it. An unrestricted key can be used outside your app, which means someone else can burn usage against your billing account.
Set restrictions on the key so it only works from your Bubble app’s domain. If you use both development and live versions, account for both. If you’re not sure how to think about key hygiene, this walkthrough on handling API credentials safely with Stripe is useful because the same operational mindset applies. Keep the key scoped to what your app needs.
Practical rule: If your API key works everywhere, it’s configured badly.
Turn billing on, then add guardrails
Google Maps products require billing to be enabled. That scares people, but the better approach is simple: enable billing and put visibility around it immediately.
Do these three things on day one:
Attach a billing account so the APIs can function properly.
Create a budget alert so you get warned before usage drifts.
Check usage by API inside Google Cloud so you can see whether map rendering, place lookups, or other calls are driving cost.
Founders often skip the last step, and that’s the mistake. If costs rise, you need to know which part of the stack is doing it.
Don’t overcomplicate the first pass
You do not need a deep cloud architecture plan for a Bubble MVP. You need a secured project, the right APIs enabled, a restricted key, and alerts that keep you awake before your invoice does.
That’s enough to build responsibly.
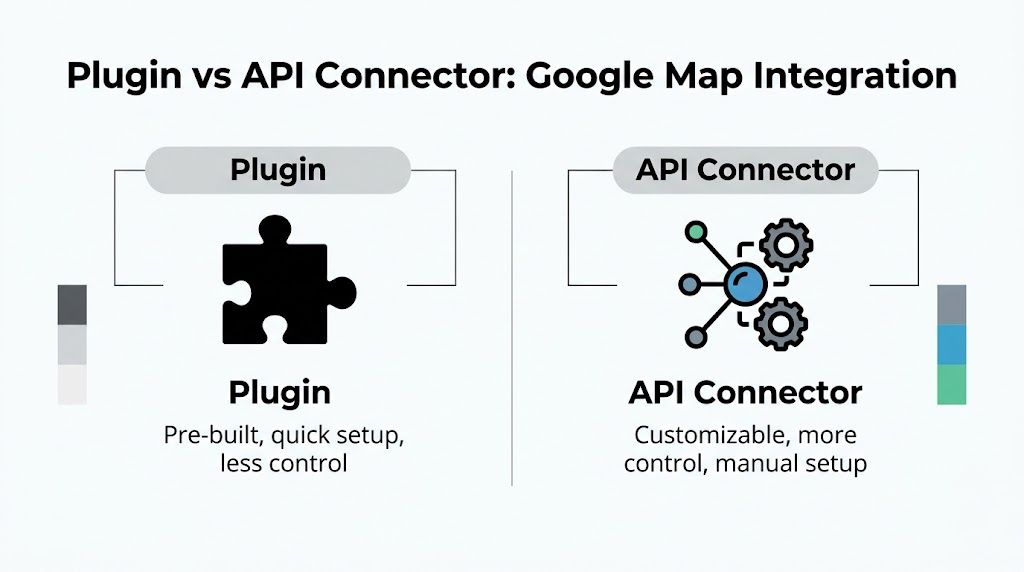
The Big Decision Plugin vs API Connector
This is the decision that affects your build speed now and your flexibility later.
If you use a Bubble marketplace plugin, you’ll usually get a faster setup. You install it, drop an element on the page, paste in your key, and start wiring workflows. That’s attractive when you need a demo this week. The trade-off is control. Some plugins are excellent. Some are lightly maintained, opinionated, or hard to bend once your app grows.
If you use the API Connector, setup takes longer. You’ll read docs, configure calls, and test responses manually. But you own the logic. You can shape the data, chain calls, and avoid being boxed in by someone else’s plugin design.
The real business trade-off
A plugin saves time when your requirement is standard. A founder directory, booking form, property search MVP, or local service signup can often start there.
The API Connector wins when the location data feeds multiple business rules. If you need validation, fallback logic, custom filtering, list views, workflows in Zapier, or a hybrid search-and-save flow, the connector usually gives you a better foundation.
Google’s own implementation examples emphasize precision around how search is biased and handled. Separately, Google Maps Platform material notes that in Bubble, chaining a frontend SearchBox to a backend TextSearch via the API Connector can increase conversion by 28% for e-commerce MVPs, but requests should be throttled to 5 queries per second to avoid 429 errors, which occur in about 5% of cases at scale, according to Google Maps Platform guidance on search quality improvements.
That matters because founders often judge tools only by setup speed. They should judge them by setup speed plus future workflow value.
Plugin vs API Connector for Google Maps
Factor | Marketplace Plugin | Bubble API Connector |
|---|---|---|
Speed to first result | Usually faster for a basic MVP | Slower at the start |
Upfront complexity | Lower | Higher |
Flexibility | Depends on the plugin author | High |
Control over returned data | Often limited to exposed fields | You choose what to use |
Dependency risk | Tied to plugin updates and maintenance | Tied more to your own setup |
Best for | Simple address search and display | Validation, custom workflows, scaling logic |
Budget fit | Good if time is more expensive than subscription fees | Good if you want to minimize recurring tool cost |
Long-term maintainability | Mixed | Usually stronger if documented properly |
When I’d choose each one
Choose a plugin if:
You need a working demo quickly. Investor preview, pilot launch, or client walkthrough.
Your location need is narrow. Search, select, show on map, save.
You don’t want to debug raw API responses yet.
Choose the API Connector if:
You expect the app logic to grow. Delivery zones, service coverage, nearby results, route-based pricing.
You want to avoid recurring plugin lock-in.
You care about understanding exactly what triggers cost.
A plugin is often the right MVP choice. It’s the wrong choice when you’re already fighting its limits in week one.
My rule is simple. If location is a side feature, pay for speed. If location is central to the product, invest in control earlier.
Implementing Your Google Map Search Box in Bubble
Once your key is ready and you’ve picked your integration path, the build itself gets much more concrete. You’re creating a small system, not just a visual widget.
Put an input on the page for the search term. Put a map element nearby. Decide where the selected place data will live. In Bubble, that usually means either custom states during selection or database fields when the user confirms.

Path A with a plugin
With a plugin-based setup, the workflow is usually straightforward:
Install a Google Maps or Places-style plugin from the Bubble marketplace.
Add the plugin’s map element and search input element to the page.
Paste your API key into the plugin settings.
Configure the search element to return the place or address data.
When a user selects a result, send the returned location to the map and drop a marker.
This route is good when you want fewer moving parts in the editor. The downside is that plugin settings can hide important choices. If the plugin doesn’t expose the data you need, you can hit a wall quickly.
Path B with the API Connector
The more flexible route is to let Bubble call Google directly. Google’s Places SearchBox implementation follows a practical sequence: load the Maps JavaScript API with the Places library, create the map instance, initialize a search input with google.maps.places.SearchBox(input), bind the search box to the map bounds, and handle the places_changed event so you can retrieve results, add markers, and fit the map to the chosen place, as shown in Google’s Places SearchBox example.
The key step is viewport biasing. If you don’t bind the search box to the current map viewport, 40% of results can become globally irrelevant. When configured properly, the search box can achieve a 92% match rate to user intent in urban areas in Google’s cited developer benchmarks from that example.
That one technical choice has a direct product effect. Users feel like the app “gets” where they mean.
If you want a separate Bubble example for working with addresses once they’re returned, this tutorial on plotting multiple addresses in Bubble is a useful companion.
A clean Bubble workflow pattern
Here’s the pattern I like for non-technical founders:
Input change triggers an autocomplete request or plugin suggestion list
User clicks one suggestion
Store temporary result in custom states
Update the map center and marker
User clicks Save
Write formatted address, latitude, longitude, and place ID to the database
This keeps typing separate from saving. That’s important because users often change their mind mid-search.
A quick visual walkthrough helps here:
What works and what doesn’t
What works:
Saving coordinates as separate fields instead of only saving plain text
Using custom states during search so you don’t write incomplete data too early
Updating the map only after a result is chosen instead of on every keystroke
What doesn’t:
Treating free-text input as a trusted address
Saving only the visible label
Ignoring viewport bias, then wondering why search relevance feels off
If the user can type anything but your workflows need structured location data, selection has to be explicit.
Powering Workflows and Improving User Experience
Once the google map search box works, the next question is whether it powers the app or just decorates it.
A selected place should become useful data inside Bubble. That usually means saving the chosen address, the lat/lng, and sometimes a place ID to a Thing like Order, Job, Property, or Business. From there, your workflows can use that location for matching, pricing, filtering, and automation.
The minimum data worth saving
For most MVPs, save at least:
Formatted address for display back to the user
Latitude and longitude for logic and distance-based features
Place ID if your setup exposes it and you may need to re-query later
That combination keeps your app flexible. A plain address string is fine for display, but weak for workflows.
Useful workflow patterns in Bubble
Once the location is saved, Bubble can do a lot with it:
Nearby matching for marketplaces or local directories
Delivery logic where address choice affects fulfillment
Lead routing to the closest rep or service region
Admin reporting by city, neighborhood, or custom territory
Automation handoff to tools like Google Sheets, Zapier, Trello, or Mailchimp
Non-technical founders usually realize an “aha” moment. The map isn’t the feature. The location data is.
A strong location workflow feels invisible to the user. They search once, and the rest of the app reacts correctly.
UX details that make the build feel professional
The best location experiences in Bubble are usually built from small decisions:
Clear the input after selection if the chosen place is shown elsewhere on the page.
Use a loading state while results are being fetched so users don’t double-type.
Center the map on the user’s current area when that makes the use case easier.
Show a confirmation label so users know what address was selected.
Handle edits cleanly if the user changes their mind.
There’s also a strategic angle for local business apps. Google support material highlights growing demand among no-code users for advanced search box use cases like filters and Plus Codes. That same source includes a future-dated claim that a 2026 study noted personalized search results can reduce small business visibility by up to 15% if not managed correctly, which is cited in Google Maps support on search options and coordinates. For founders building local discovery tools, that’s a reminder not to rely blindly on personalized search behavior when fairness or exposure matters.
Keep the product logic separate from the map UI
This is the cleaner way to understand it:
UI job | Workflow job |
|---|---|
Let the user search | Save structured place data |
Show the chosen location | Trigger business rules |
Display a marker | Feed nearby or pricing logic |
Help the user edit | Update the record safely |
When these two jobs stay separate, your Bubble app is easier to maintain.
Managing API Costs and Common Pitfalls
The expensive mistake with Google Maps isn’t usually one giant error. It’s a collection of small, casual decisions.
A founder leaves a key unrestricted. A plugin fires too many calls. The app searches on every keystroke with no control. A broken result state triggers retries. None of that feels dramatic inside Bubble, but it adds up.
What usually drives cost
Google Maps billing follows usage patterns tied to API calls and sessions, not your personal sense of how “simple” the feature feels. That’s why founders should watch usage from the first real test group.
If you want a broader pricing mindset beyond Maps alone, a guide to Google Cloud prices and saving big is worth reviewing because it helps you think in terms of service-by-service visibility rather than one vague cloud bill.
The practical fix is to inspect your usage dashboard regularly and ask:
Which API is being called most often
Whether search requests are being throttled sensibly
Whether failed requests are retrying unnecessarily
Whether users are saving locations once or searching repeatedly because the UX is clunky
Common problems that waste time and money
These are the issues I see most often in Bubble builds:
“For development purposes only” on the map Usually this points to billing not being set up properly or the key not matching the enabled APIs.
“API key not valid” Often caused by restrictions that are too tight, the wrong project, or a mismatch between live and test domains.
Blank screens on failed searches Don’t leave users staring at nothing. Handle no-result states with a message and a fallback action.
Over-triggering requests If your workflow fires on every tiny input change with no debounce logic, usage climbs fast.
Watch this first: most map billing issues are workflow issues wearing a technical disguise.
Privacy and product behavior matter too
Google notes that every query in the Maps search box is logged under a user’s Web & App Activity if enabled, and that this history powers features like Your Timeline, which visualizes search-triggered location data. The same support material says this is significant for the 80% of users who rely on mobile Maps, according to Google Maps help on managing Maps history and activity.
For founders, this matters in two ways.
First, users may see personalized suggestions based on prior behavior, which can make testing inconsistent across accounts. Second, if your app’s UX depends on predictable location choices, your own QA process should use test accounts and controlled conditions where possible.
A sensible founder checklist
Before launch, verify these points:
Billing is active and monitored
The API key is restricted to your app
The map and search features work in both development and live
Failed searches show a useful fallback
Search requests aren’t firing more often than necessary
That checklist won’t eliminate every surprise. It will eliminate most of the avoidable ones.
From Map to MVP
A working google map search box changes what your Bubble app can do. It turns a vague location field into something operational. Users can search, confirm, save, and move forward without friction. Your workflows get structured location data instead of messy free text. That’s a real product upgrade.
The big wins are practical. Secure the key early. Pick the integration path based on business needs, not just convenience. Save coordinates, not only addresses. Keep an eye on usage before your app grows. That’s how you avoid rebuilding the feature later under pressure.
If you’re still shaping the rest of your product, this guide on how to build an MVP fits nicely with the same mindset: build the core flow first, keep the stack understandable, and only add complexity when the product earns it.
If you want hands-on help building this in Bubble, Codeless Coach offers practical one-to-one support for founders who’d rather ship than spend another week wrestling with plugins, API keys, and workflows alone.


