Mar 21, 2026
A Founder's Guide to Build an MVP Without Code
Learn how to build an MVP with no-code tools like Bubble. This guide gives founders a practical roadmap for planning, building, and launching a startup.
So, you have an idea for a web app. The biggest hurdle for most founders isn't the idea itself—it's figuring out how to turn that concept into a real, working product without a technical background. It can feel completely overwhelming.
The good news? You no longer need to be a coder to build and ship a powerful application. Thanks to the no-code movement, founders and creators can now build their own software faster and for a fraction of what it used to cost.
This guide is your roadmap. We’re going to walk through the entire journey, from refining your idea to launching a functional app using Bubble.io, one of the most powerful no-code platforms out there. The key to all of this is focus: solve one critical problem for one specific type of user. Get that right, and you'll sidestep the deadly trap of feature bloat that sinks so many great ideas.
Here's a simple way to visualize the process ahead.
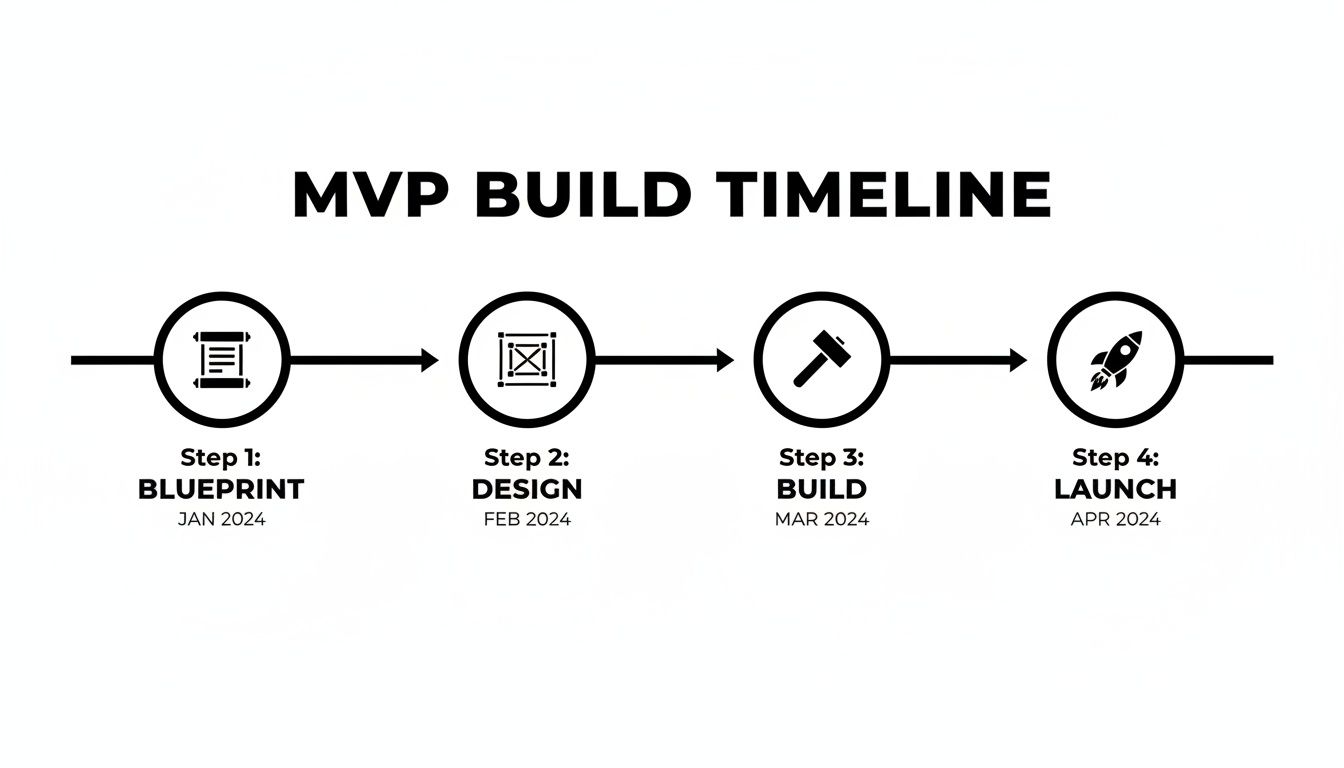
As you can see, the "build" is just one piece of the puzzle. It’s sandwiched between crucial planning upfront and essential learning from your users on the back end.
A High-Level Look at Your MVP Timeline
To help you plan, here's a rough breakdown of what to expect. This timeline assumes you're a solo founder working on this part-time. If you have a co-founder or can dedicate full-time hours, you can definitely move faster.
Phase | Objective | Estimated Time (Solo Founder) | Key Deliverable |
|---|---|---|---|
1. Blueprint | Define the core problem and user. Scope the single most important feature. | 1-2 weeks | A one-page document outlining the user, problem, and solution. |
2. Design | Create simple wireframes and map out the user flow and database structure. | 1 week | Low-fidelity wireframes (e.g., Balsamiq, Figma) and a data map. |
3. Build | Construct the core functionality, user accounts, and essential integrations. | 3-6 weeks | A functional Bubble application with the core feature working. |
4. Launch | Onboard the first users, gather feedback, and analyze initial metrics. | 1-2 weeks | A live app with your first 10-20 active users. |
Remember, these are just estimates. The real goal isn't to hit a specific date but to move through each phase thoughtfully. Rushing the blueprint will only lead to a messy, unfocused build later on.
The Power of Building Without Code
The shift to no-code isn't just a small trend; it’s fundamentally changing how software gets made. The numbers back this up: the no-code development market is expected to jump from $35.61 billion in 2025 to a staggering $102.57 billion by 2030. This isn't just hype—it shows that founders are seeing the strategic advantage of building their first product this way.
Think of this guide as a practical companion, not a theoretical lecture. The principles behind building a Minimum Viable Product (MVP) are simple, but they're incredibly powerful when put into practice. If you're new to the term, I'd recommend reading our article on what an MVP is and why it's so important.
The goal isn't to build a perfect, feature-complete product. The goal is to build just enough of a product to validate your core assumption and start learning from real users as quickly as possible.
What to Expect in This Guide
My aim here is to empower you. We'll go through the entire process step-by-step, making sure every stage is clear and actionable. Here’s a quick look at what’s coming up:
Scoping & Design: I'll show you how to interview potential users to get real insights and then translate those into simple wireframes that will become the blueprint for your app.
Core Functionality: We’ll dive right into the Bubble editor to build out your app’s essential features, from user sign-ups to the main function you're offering.
Essential Integrations: We'll connect services like Stripe for payments and Twilio for sending SMS notifications, making your app feel complete.
Launch & Feedback: Finally, we’ll cover strategies for a "soft launch" and, most importantly, how to use that crucial early feedback to decide what to build next.
Scoping and Designing Your No-Code Application
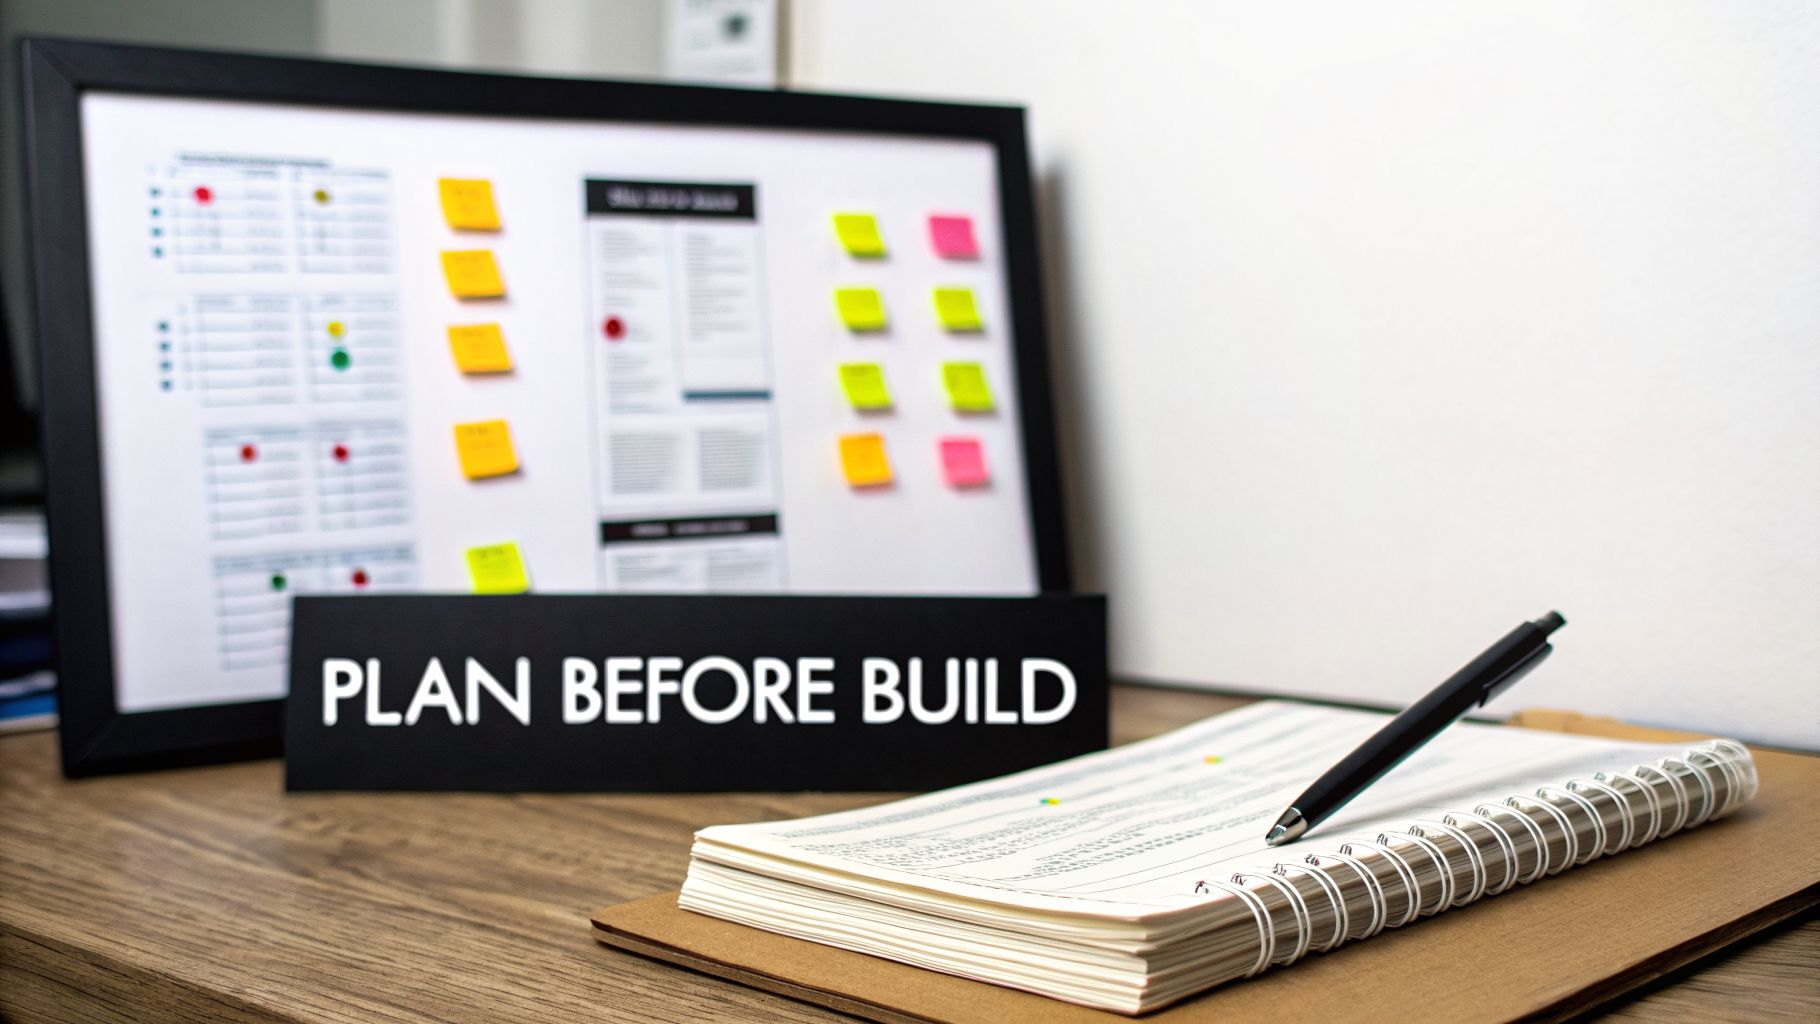
I can't tell you how many times I've seen founders get so excited about an idea that they dive straight into the Bubble.io editor. It’s a huge mistake. The real work, the work that separates a successful MVP from a failed one, happens long before you drag your first element onto the page.
Jumping into the build without a solid plan is like starting a road trip without a map. Sure, you’ll get somewhere, but it’s almost never where you intended to go. This planning phase is your best defense against wasting months of effort and a ton of money building something nobody wants.
Think of it like this: your tools right now aren’t workflows and plugins. They’re a notebook and clear thinking. You're creating the blueprint.
Start with a Problem, Not a Vague Idea
Every great app solves a real, painful problem. So many aspiring founders start with a feature-led idea, like, "I want to build a better project management tool." That’s not a problem; it's a category. It's way too broad.
You have to get hyper-specific to build an MVP that resonates. Start by asking yourself a few tough questions:
Who is this for, really? "Creatives" is not an answer. "Freelance graphic designers who work with small business clients" is an answer.
What's the single most annoying thing about their current process? Maybe it's "They struggle to get timely and clear feedback from clients on visual drafts."
How does this problem actually cost them? "Endless back-and-forth emails delay project approvals, which means they get paid later and can take on fewer clients."
Now you’re getting somewhere. You can distill this into a razor-sharp problem statement: "Freelance graphic designers need a simple way to get consolidated, visual feedback from clients directly on their designs to cut down on endless email chains and shorten approval times." Every decision from here on out should serve that one specific statement.
Get Out of the Building and Talk to People
With a clear problem hypothesis, it's time to see if anyone else actually has this problem. Your mission is to find and talk to at least 10 of these potential users.
Don't overcomplicate it. You can find your people in LinkedIn groups, on Reddit, or even through your own network. The key here is not to sell your idea—it's to listen.
Your only goal in these conversations is to learn. Ask open-ended questions about how they handle client feedback right now. Listen for their pain points. Do not, under any circumstances, pitch your solution.
You'll know you're onto something when you hear them describe the exact frustrations you've identified, without you having to lead them there. If they're practically begging for a solution by the end of the call, you've struck gold.
Define Your Uncomfortably Small Core Feature Set
After those interviews, your head will be swimming with ideas. Now comes the hard part: you have to be absolutely ruthless. A great MVP does one thing perfectly, not ten things poorly.
Go back through your interview notes. What is the one feature that solves the most acute part of the problem you just validated? For our graphic designer example, it’s not a fancy dashboard or an invoicing system. It's an image uploader where a client can literally click on a spot and leave a comment. That's it.
Everything else—project management, time tracking, user roles—gets put on the "Not Now" list. Your initial feature set should feel almost embarrassingly simple. That's how you know you're doing it right.
Wireframe the User Journey
Okay, you've got your core feature. Now, how will someone actually use it? This is where wireframing comes in. You’re essentially creating a stick-figure sketch of your app's flow. You don't need to be a designer; you just need a pen and paper or a simple tool.
I personally love using Figma for this. It's free and easy to get started.
You’re not worried about colors or fonts here. You're focused on the functional layout. Where does the "Upload Design" button go? What happens after they upload it? How does a client view it and add a comment? You are mapping out the most intuitive path for the user to take to get their job done.
Plan Your Bubble Database (This Is the Real Secret)
This final step is what separates amateur Bubble developers from the pros. Before you build a single page, you must plan your database structure. Getting this right from the start will save you from a slow, buggy app and a painful rebuild later. Trust me on this.
Think about the information you need to store. For our feedback tool, we’d need a few core "Data Types" in Bubble:
User: Stores info for both designers and clients (email, name, role).
Project: A container for a set of designs (name, client).
Design: The actual image file (image, which project it belongs to).
Comment: The feedback itself (text, X/Y coordinates on the image, the user who wrote it).
Just as important is thinking about how they all connect. For example, a Project will have a list of Designs attached to it. A Design will have a list of Comments. Nailing this logic before you build makes the actual development process 10x faster and more scalable.
This planning phase might feel slow, but it's the professional way to approach building an app. You're setting the foundation for success before you even log in to Bubble.
Bringing Your Core Functionality to Life in Bubble
Alright, the planning is done. Now for the fun part: rolling up our sleeves and turning that blueprint into a real, clickable application inside the Bubble editor. This is where your idea starts to breathe.
Our goal right now is to build a functional 'Version 0.1'. We're not chasing perfection; we're chasing proof of concept. Forget the bells and whistles and the pixel-perfect details for now. We are here to build the absolute essential features that make your app work. Think of it as building the engine of the car, not polishing the chrome.
Your Database Is Your Foundation
Before you drag a single button onto the page, head straight to the Data tab. I can't stress this enough: a well-organized database is the bedrock of a scalable and performant Bubble app. Getting this wrong is the number one reason I see founders having to do expensive rebuilds later.
Let's stick with our job board example. Based on your planning, you probably have a good idea of the data you need to store. A simple, solid structure might look something like this:
User: Bubble provides this out of the box. We can add a custom field, maybe called "Role" (type: text), to flag users as either a "Job Seeker" or an "Employer."
Company: This will hold all the employer information. You’ll need fields for
Name(text),Logo(image), andWebsite(text).Job_Listing: The heart of the app. This needs fields like
Title(text),Description(rich text), andLocation(geographic address). Most importantly, you need to connect it to the Company by adding a field likeCompany(field type: Company).
That last part is crucial. By linking the Job_Listing to the Company, you can easily pull the company's name and logo onto the job post page. Nailing these relationships from day one will save you countless hours of frustration.
Getting User Authentication in Place
Every real app needs a way for users to sign up and log in. Let's tackle that right away. While Bubble makes this process fairly simple, the devil is in the details.
You'll start by adding input elements for an email and a password, plus a "Sign Up" button on your page. The real work happens in the Workflow tab. You'll set up a workflow that triggers when the "Sign Up" button is clicked and uses the "Account -> Sign the user up" action.
But don't stop there. A common rookie mistake is ending the workflow right after signup, leaving the user stranded on the same page.
Always add a final step to the signup workflow: "Navigate -> Go to page..." and send them to a welcome screen or their new dashboard. It’s a small detail that makes the experience feel complete instead of broken.
The login process is very similar, just using the "Log the user in" action instead. Once these two workflows are live, your project starts to feel like a genuine application.
Building Out the Core Feature
Now it's time to build the main event—the one thing your MVP absolutely must do. For our job board, that’s letting an employer post a new job. This is all about creating a new entry in your database.
This typically breaks down into three parts:
An input form: Design a page (or a popup) with fields for the job title, description, and other details you need.
A "Submit" button: This is what kicks off the workflow.
A "Create a new thing..." workflow: This is the action that takes the data from your form and saves it as a new
Job_Listingin your database.
To make the user experience even better, think about what happens after they click submit. A great move is to automatically redirect them to the page for the job they just created. It gives them instant confirmation that everything worked. This is the moment you prove you can build an MVP that delivers on its core promise. If you're just getting started with the editor, our overview of the Bubble app builder is a fantastic resource.
Making It Responsive from Day One
Your app has to look good and work well on a phone. Period. A 2023 study found that mobile devices account for over 60% of all website traffic, so ignoring mobile simply isn't an option.
Luckily, Bubble's responsive engine is incredibly powerful. As you build, constantly toggle between the desktop and mobile previews in the editor. Get comfortable using container layout settings like "Row" and "Column," and set minimum and maximum widths to control how elements stack and resize. One tip I always give clients is to group related elements together; it makes managing their responsive behavior a whole lot easier.
As you build, remember you don't have to create everything yourself. Smart founders often integrate with Bubble to connect with powerful third-party services. This can add huge value to your MVP without you having to build complex features from the ground up.
Integrating Essential Third-Party Services
Your app doesn't live in a vacuum. To actually do things—like charge money, send a text, or talk to other software—it needs to connect to the outside world. This is done with APIs, and while that term can sound a bit scary for non-technical founders, Bubble.io's API Connector makes it surprisingly straightforward.
Let's walk through how to plug in some of the most critical services for any new product. We'll cover the big ones you'll almost certainly need: processing payments with Stripe and sending notifications with Twilio. You'll see that you don't need to be a developer to bolt on professional, powerful features.
Setting Up Stripe for Seamless Payments
If you plan on making money, a payment processor isn’t optional. Stripe is the gold standard, and for good reason: it’s secure, developer-friendly, and integrates beautifully with Bubble.
First things first, you’ll install the official Stripe plugin made by the Bubble team. This plugin does most of the heavy lifting, giving you pre-built actions to create checkouts, manage subscriptions, and handle payments without touching code. The only real trick is getting your API keys configured correctly.
You’ll have two sets of keys to manage:
Test Keys: For all your development work. These let you run endless fake transactions with test credit card numbers, so you can build and refine your payment flows without spending a dime.
Live Keys: For your live, public-facing app. When you're ready to launch and take real money from real customers, you'll swap in these keys.
Protecting these keys is crucial. Bubble gives you separate input fields for your test and live keys, which makes it simple to manage your development and production environments. For a more detailed walkthrough, we've put together a guide on how to get your Stripe API key and set it up properly.
Once connected, you can build workflows like, "When a user clicks the 'Subscribe' button, collect their card info and create a new subscription." Just like that, your MVP goes from being a cool project to a real business.
Keeping Users Informed with Twilio SMS
Email is fine, but for urgent notifications, nothing beats a text message. Think appointment reminders, two-factor authentication codes, or order confirmations. Twilio is the king of this space, and we can hook it up using Bubble's API Connector.
Connecting Twilio is a bit more manual than the Stripe plugin, but it's a fantastic exercise for understanding how APIs really work. You’ll set up a new API connection, plug in Twilio’s endpoint for sending messages, and authenticate using your Account SID and Auth Token.
This is a great way to get comfortable with the concept of an "API call." When your app needs to send a text, your Bubble workflow packages up the phone number and message, "calls" Twilio's API, and Twilio takes care of the delivery.
A classic example is creating a workflow that triggers when a user signs up. The final step could be an action that calls your Twilio API to send them a friendly welcome text. It’s a small touch that makes your app feel polished and dramatically improves the user experience.
To launch a successful MVP, you'll likely need a few key third-party services. These integrations provide core functionality that users expect, like payments and notifications, saving you from having to build everything from scratch.
Essential MVP Integrations
Service | Primary Function | Why It's Essential for an MVP |
|---|---|---|
Stripe | Payment Processing | The industry standard for accepting one-time payments and recurring subscriptions online. |
Twilio | SMS & Voice Communication | Perfect for sending time-sensitive alerts, 2FA codes, or appointment reminders. |
Zapier | Workflow Automation | Connects your app to thousands of other tools for internal operations, like getting a Slack alert for new signups. |
This table covers the essentials. By focusing on these, you can deliver a robust user experience without getting bogged down in building back-end tools that already exist.
Connecting Your Operations with Zapier
Your MVP needs to serve your users, but it also has to work for you. That's where a tool like Zapier comes in. It's the digital glue that connects thousands of web apps, letting you automate your own internal workflows.
Instead of spending weeks building a custom admin dashboard, you can use Zapier to get the job done. Here are a few things I've seen founders do:
New User Alerts: Create a "Zap" that pings you in a Slack channel every time a new user signs up in your Bubble app.
Simple CRM: Automatically add every new customer to a Google Sheet or an Airtable base.
Content Moderation Queue: If your app has user-generated content, a Zap can send new submissions to a Trello board for your review.
This approach is a massive time-saver. You get to focus your energy on the core features your users will see, while Zapier handles the operational busywork behind the scenes.
Launching and Gathering User Feedback
Alright, you've put in the work and your MVP is finally built. The core features are working, the APIs are talking to each other, and you have a real, functioning application. It’s tempting to pop the champagne, but hold on—the real test is just about to begin. Now it’s time to see how your creation holds up in the wild.
This is the moment of truth. You’re not just hunting for bugs; you're trying to answer the single most important question: did you actually build something people want? The feedback you gather now will be the fuel that turns your simple MVP into a real, sustainable business.
Before You Go Public: Your Pre-Launch Checklist
Before a single user from the public sees your app, you need to run a private testing round. The goal here is simple: catch all the glaring issues and awkward user flows you've become blind to after staring at the Bubble editor for weeks.
The biggest mistake I see founders make is just firing off a link to a few friends and asking them to "check it out." That's a recipe for getting vague, useless feedback like "looks cool!" You need to be more structured.
Give your testers a mission. Don't just give them a URL; give them specific jobs to do. For a job board, that might be "Sign up and post a new listing for a 'Senior Designer'" or "Find and apply for a remote marketing job." This forces them through the core workflows you've built.
Watch them, don't help them. If you can, jump on a quick Zoom call, have them share their screen, and just watch. Ask them to think out loud. The most valuable insights come from seeing where they hesitate, get confused, or click on the wrong thing. Let them struggle a bit!
Keep bug reports organized. Don't let feedback get lost in a dozen text messages and email chains. Use something simple like a Google Form or a Trello board to log issues. Ask for what happened, where it happened, and what they expected to happen.
Seriously, this initial round with just 5-10 trusted people will uncover 80% of the major problems. Fix these first.
What to Actually Measure: Your North Star Metrics
Once you’ve squashed the most critical bugs, you’re ready for a "soft launch." You're not aiming for a TechCrunch headline; you're targeting a small, hand-picked group of ideal users to measure what really matters: engagement.
You don't need a fancy analytics suite yet. Bubble gives you everything you need to track the important stuff.
User Signups: The most basic sign of life. Are people curious enough to create an account? You can see the count right in your User data table.
Core Action Completion: This is your most important metric. If you built a job board, how many jobs are actually being posted? This is as simple as looking at the number of entries in your
Job_Listingdata type.User Drop-Off: Check Bubble's server logs to see where people are getting stuck. If you see a dozen users start a "Create Post" workflow but never finish it, you've found a major friction point that needs fixing.
Focus on one or two key metrics that prove your app is delivering on its core promise. For a feedback tool, it's 'comments left,' not just 'users signed up.' This tells you if people are actually using the feature you built.
The Art of the Soft Launch
A soft launch isn’t about a big press release or a fancy ad campaign. It’s about strategically getting your MVP in front of a small audience that will provide honest, high-quality feedback. Think about where these people already spend their time.
Niche Subreddits: Find the subreddit where your target users complain about the very problem you’re trying to solve.
Product Hunt: This is a fantastic community of early adopters who love trying new things and giving feedback.
Private Beta List: Remember those first 10 people you interviewed for validation? They are your VIPs. Give them first access.
Your launch post shouldn't be a sales pitch. Be transparent. Tell them it's a brand-new MVP and you're actively looking for feedback to make it better. People appreciate the honesty and are often more willing to help you succeed.
As soon as your MVP is live, your top priority is to actively collect customer feedback to figure out your next moves. This is the raw material for your entire roadmap. It tells you what to build, what to fix, and what to scrap. The launch isn't the finish line; it’s the starting line of a continuous cycle of building, measuring, and learning.
Answering Your Top Questions About Building a No-Code MVP
After hundreds of coaching sessions with founders, I've noticed the same questions pop up time and time again. If you're thinking about building your MVP, chances are these are on your mind, too. Let's get them answered so you can start your journey with Bubble.io on the right foot.
Here’s the straight talk on what to expect.
How Long Does It Really Take to Build an MVP with Bubble?
There’s no magic number, but I can give you a realistic range. A focused solo founder who has done their homework—meaning solid research and a well-defined scope—can typically get a functional MVP live in 4 to 8 weeks.
Of course, this varies. A simple directory might only take 2-3 weeks. A more complex platform with tricky logic could easily stretch to 3+ months.
The single biggest variable is always scope. I've seen founders shave weeks off their timeline with a single coaching session dedicated to ruthlessly cutting features back to the absolute core. It’s the highest-leverage thing you can do upfront.
Can a Bubble MVP Handle Thousands of Users?
Absolutely. There's a persistent myth that no-code tools can't scale, and it’s just not true. Your Bubble app's performance comes down to how well you build it, specifically your database design and how you query your data.
A well-architected app has no problem handling thousands of daily active users. In fact, many successful startups scale significantly on Bubble before they ever even think about touching custom code. Optimizing for performance is a skill, but it’s one you can definitely learn within the Bubble ecosystem.
What Are the Biggest Mistakes People Make?
I see first-time builders fall into the same traps over and over. Just knowing what they are is half the battle.
Scope Creep: This is the #1 project killer. It's that constant temptation to add "just one more cool feature" instead of staying obsessed with the one core problem you're trying to solve.
Ignoring Database Design: A messy data structure is like building a house on a foundation of sand. It will eventually crumble into a slow, buggy app that's a nightmare to update.
Building in a Vacuum: The whole point of an MVP is to learn from your users. If you disappear for three months and build without getting consistent feedback, you’re just guessing. And you’re probably guessing wrong.
Seriously, if you can avoid just these three things, you'll be ahead of 90% of other founders.
When Should I Get Help Instead of Grinding It Out?
Learning on your own is fantastic, but your time is the one resource you can't get back. As a founder, you have to be strategic about when to call in an expert.
It's time to get help when:
You've been banging your head against the same technical problem for more than a couple of hours.
You need a second opinion on your project scope or database structure before you start building.
You're about to launch and want an expert to review your app's performance and security.
A one-hour coaching session can often fix a blocker that would have cost you a week of frustration. That's a massive acceleration on your path to launch.
Ready to stop spinning your wheels and get expert, one-on-one guidance to build your MVP faster? Codeless Coach offers tailored tutoring sessions to help you conquer Bubble, from initial scoping to a successful launch. Book a session today and turn your idea into a reality.


