Mar 15, 2026
A Guide to Implementing Sound on Hover in 2026
Learn how to implement sound on hover with HTML, JavaScript, and Bubble. This guide covers best practices and accessibility for a better UX.

Adding sound on hover isn't just a fun gimmick; it's a seriously effective UX tool. When used correctly, it gives users instant, satisfying feedback that makes your website feel incredibly responsive and alive. This small audio cue is powerful because it mimics how we interact with the real world, reinforcing a user's action and making them more confident as they explore your site.
Why Sound on Hover Is a Powerful UX Tool
Let's face it, we’re all drowning in visual noise. Adding another sensory layer is a brilliant way to make your brand experience stick. A subtle sound on hover isn't about being loud or distracting—it’s about creating a more tangible connection between a person and your interface.
When a button lets out a soft click or a menu item gives a gentle swoosh as the mouse passes over, it closes the feedback loop instantly. This simple addition confirms the interaction faster than a visual change can on its own, making the whole experience feel more intentional.
For anyone building an MVP, this is a secret weapon. A small detail like this gives off a premium, polished vibe that can seriously influence how users perceive your product's quality. Before we jump into the "how," it's crucial to understand why this works so well.
Guiding Users With Audio Cues
Sound is an incredibly intuitive guide. Think about video games—that little ding when you pick up an item confirms the action immediately. A hover sound on your website does the same thing, letting users know an element is interactive without them having to second-guess. This is a lifesaver for designs with subtle clickable areas or complex navigation.
A great place to look for inspiration is the gaming world, which has perfected this for years. Applying some of the best practices for game UI sounds can bring that same level of immersion and responsiveness to your web design.
This shift from purely visual feedback to a multisensory experience is really gaining traction. User tests have shown that well-placed audio microinteractions can boost perceived interactivity by 25%. One study even found that e-commerce sites using subtle hover sounds saw a 12% increase in add-to-cart rates—the sound subconsciously signals a successful choice before the user even clicks.
While visual effects have long been the standard, adding sound creates a much richer experience.
Visual Hover vs Sound on Hover Impact
Metric | Visual Hover Effects | Sound on Hover Effects |
|---|---|---|
User Feedback | Provides clear, expected visual confirmation (e.g., color change, underline). | Delivers instant, subconscious confirmation that deepens the sense of interaction. |
Engagement | Keeps users visually oriented and aware of interactive elements. | Creates moments of delight and surprise, making navigation feel more rewarding. |
Brand Identity | Reinforces brand aesthetics through color, shape, and animation. | Builds a unique "sound signature" for the brand, making it more memorable. |
Perceived Speed | Can sometimes feel slightly delayed depending on the animation complexity. | Feels instantaneous, making the entire interface seem faster and more responsive. |
Ultimately, sound on hover provides a layer of feedback that visual effects alone can't match, making the user's journey feel more complete.
Creating a Memorable Brand Identity
Beyond simple usability, sound is a massive branding opportunity. A unique set of audio cues can become your website's signature, making it instantly recognizable.
Reinforce Your Vibe: A playful pop is perfect for a creative agency, while a sophisticated, low-key chime feels right for a luxury brand.
Boost User Satisfaction: The right sound provides a tiny moment of delight, turning a boring task like navigating a menu into something more enjoyable.
Stand Out From the Crowd: In a digital world filled with silent websites, a thoughtful sound strategy makes a huge impression.
These small interactions all add up to a more cohesive and memorable user journey. While visual design is still king, the auditory experience is becoming just as critical—especially as you design a mobile application, where haptic and audio feedback are already central to the experience.
How to Code Sound on Hover with HTML and JavaScript
If you're comfortable with a bit of code, you can build a sound on hover effect with just plain HTML and JavaScript. I've found this vanilla approach is often the best because it gives you total control and doesn't add the weight of another library to your project. All you really need is the standard HTML5 <audio> element and a couple of event listeners.
The whole thing hinges on that <audio> tag. It’s a native HTML element for embedding sound, and we’ll use a little bit of JavaScript to tell it when to play.
Setting Up the HTML Structure
First things first, you need a sound file. For UI feedback like this, smaller is always better. You want something that plays instantly, so aim for a file under 50KB. An MP3 or OGG is usually perfect for a quick blip or swoosh.
Once you have your sound, drop the <audio> tag into your HTML. You can technically put it anywhere in the <body>, but I usually place it right before the closing </body> tag to keep things tidy.
Hover Over Me!
See how we gave both the button and the audio element a unique ID? That's our hook. It’s how the JavaScript will know exactly which element to listen to and which sound to play. Super simple and direct.
This interaction isn't just for show; it's about creating a clear feedback loop for the user. They perform an action, and the sound confirms the system has registered it.
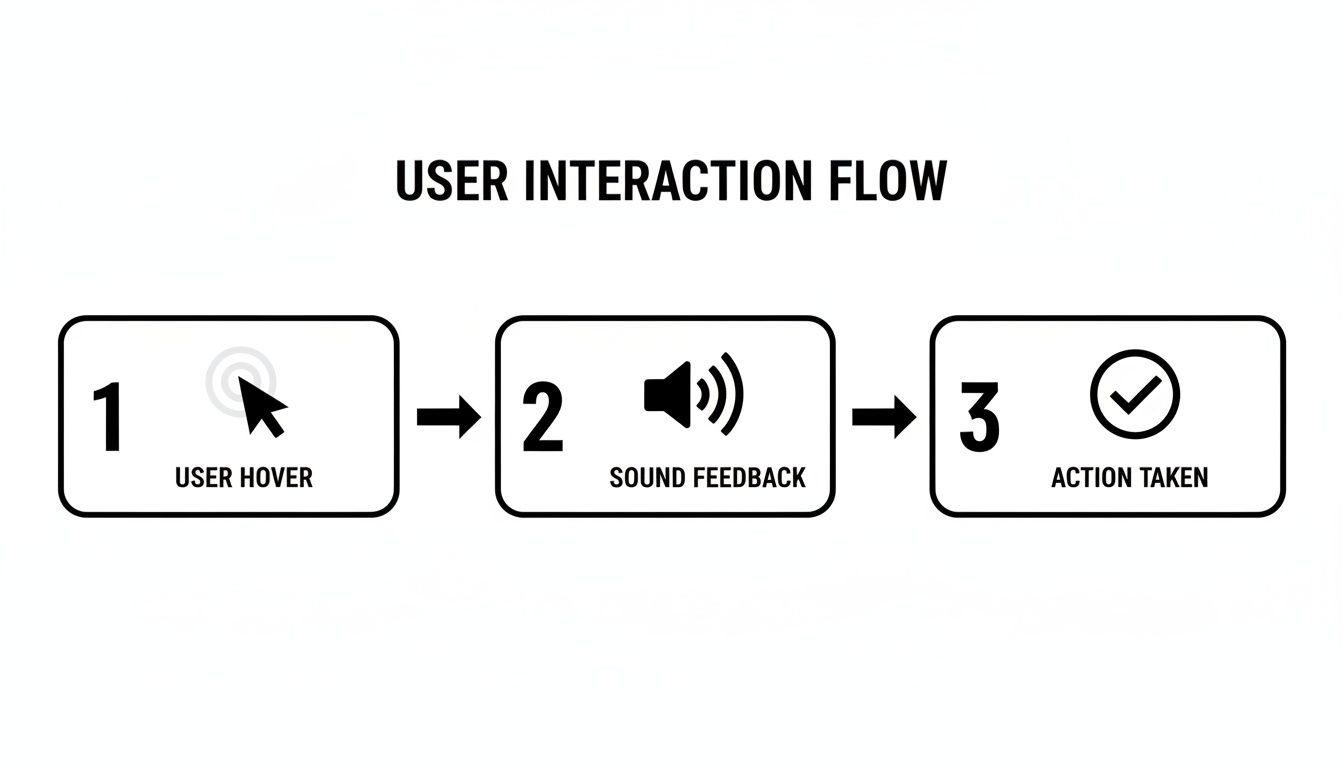
Think of the sound as a functional bridge connecting the user's hover to the potential action, letting them know the element is interactive.
Writing the JavaScript Logic
Now for the fun part. We need a script that listens for the user's mouse to move over and away from our button. The two events we care about are mouseenter and mouseleave.
When the mouse enters, we play the sound. But what happens if the user quickly moves the mouse on and off the button? To handle that gracefully, we'll also tell the sound to stop and reset when the mouse leaves.
// Grab the button and audio elements from the page
const hoverBtn = document.getElementById('hover-btn');
const hoverSound = document.getElementById('hover-sound');
// Play the sound when the mouse enters the button's area
hoverBtn.addEventListener('mouseenter', () => {
hoverSound.play();
});
// Stop and reset the sound when the mouse leaves
hoverBtn.addEventListener('mouseleave', () => {
hoverSound.pause();
hoverSound.currentTime = 0;
});
This little script does all the heavy lifting. The mouseenter listener triggers the play() method. The mouseleave listener is just as crucial—it calls pause() and resets the audio's currentTime back to the start. Without it, the sound might keep playing after the user has moved on, which feels broken and unprofessional.
Pro Tip: To make the sound on hover feel truly instant, you can give the browser a heads-up to load the file early. Just add the
preload="auto"attribute to your<audio>tag. This tells the browser to fetch the audio as soon as the page loads, eliminating any lag on the first hover.
Adding Sound on Hover in Bubble Without Code
If you're building with Bubble, you might think adding a polished sound on hover effect requires digging into JavaScript. Good news—it doesn't. You can build this entire feature visually using Bubble’s workflow editor and a simple, free plugin.
This is a perfect example of how no-code is more about creative problem-solving than just dragging and dropping. It's about seeing how to connect Bubble's own tools—workflows, plugins, and UI elements—to build an experience that feels custom-coded.
The whole process happens right in the editor, translating the logic of code into a sequence of clicks and settings.
Installing and Configuring the Audio Plugin
First thing's first: you need a way to play audio. The easiest way is with a plugin. Go to the "Plugins" tab in your Bubble app, search for "Howler.js A", and click "Install." It’s free, reliable, and gives us the exact audio actions we need.
Once it's installed, jump over to the "Design" tab. You'll now have a new "Audio Player" element available. Draw one onto your page. This element is completely invisible to your users, so I usually just tuck it in a corner to keep my editor tidy.
The important part is setting its Audio File source. You've got two choices:
Static file: Best for most UI sounds. Just upload your MP3 or WAV file directly to Bubble's database by clicking the "Upload" button in the element's property editor.
Dynamic file: If the sound needs to change based on other data (like for different items in a repeating group), you can use a dynamic expression to point to a URL stored in your database.
For a simple hover effect, a static file is all you need. Give the Audio Player element a clear name, like "Hover Sound Player," so it's easy to spot in your workflows later.
My Personal Tip: Don't forget the "Stop audio" action. When I first built this, my biggest mistake was only triggering the sound to play. This creates a horrible mess of overlapping sounds if a user moves their mouse quickly over several buttons. Always add a second workflow to stop the sound when the hover ends.
Building the Hover Workflows in Bubble
With the audio player ready, it's time to connect it to an element. Find the button or group you want to add the sound to, right-click it, and select "Start/Edit workflow."
Bubble will open the Workflow tab and automatically create a new event for you: "When Button [Your Button Name] is hovered." Now, we just tell it what to do.
Click the plus sign to add an action and find the "Play an Audio Player" action under:
Element Actions
Play an Audio Player
In the dropdown, select the "Hover Sound Player" element you named earlier.
That's the first half. Now for the crucial part that keeps things clean. Back in the Workflow tab, click to add a brand new event. For the event type, choose Elements > An element is not being hovered. Make sure to select the very same button as the element.
For this "is not hovered" event, add this action:
Element Actions
Stop an Audio Player
Again, select the same "Hover Sound Player" element.
This simple two-part workflow is the secret. The sound plays when a user hovers, and it cuts off the moment they move their mouse away, preventing any audio chaos. Getting this pattern down is a huge step, and if you're looking for more in-depth tricks, we cover tons of them in our Bubble.io help guides for founders. Your app will feel instantly more dynamic and professional.
Best Practices for Performance and Accessibility
Adding sound on hover is one of those design details that can be delightful or downright disastrous. It’s easy to get the code working, but if you’re not thinking about performance and accessibility from the start, that cool swoosh effect can quickly turn into a clunky, frustrating experience for your users.
The single biggest mistake I see is using massive audio files. For a hover effect to feel right, the sound has to be instantaneous. Any perceptible delay shatters the illusion. My rule of thumb? Keep every single audio clip well under 50KB.
How do you get files that small? It all comes down to the format and compression.
Choosing the Right Audio Format
For tiny UI sounds, you’re really only choosing between two formats: MP3 and WAV. They serve very different purposes.
MP3: This is your workhorse for web audio. It uses lossy compression, meaning it intelligently removes audio data that the human ear won't miss. For a quick button click or a subtle notification sound, the file size savings are enormous, and the quality is more than good enough.
WAV: This format is uncompressed and lossless. While it preserves every bit of the original audio quality, the files are huge. A WAV is almost always overkill for a simple hover sound and is a recipe for lag.
Honestly, for 99% of sound-on-hover cases, MP3 is the only practical choice. The goal is a fast, responsive interaction, not studio-grade audio fidelity. Compress your files aggressively; what matters is the user’s perception of speed, not whether the sound is perfectly crisp.
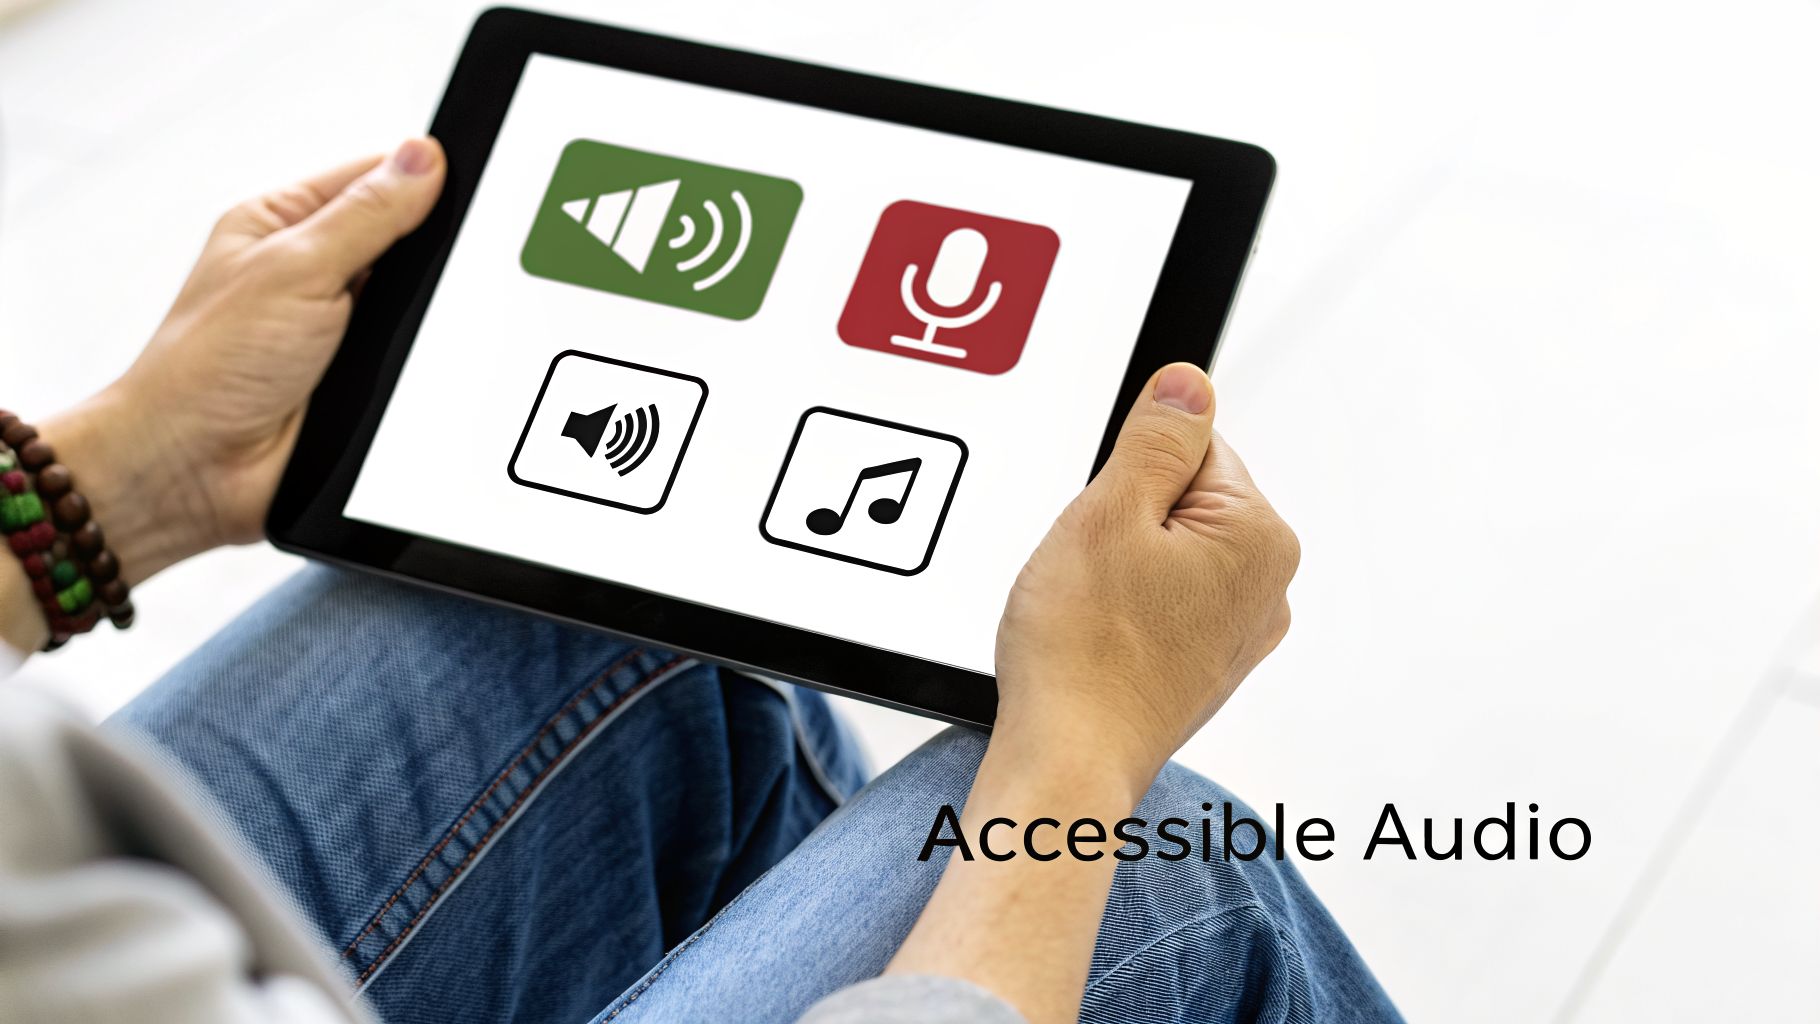
Designing for Accessibility First
Here’s something you can’t forget: sound should never be the only feedback an element provides. It must always be an enhancement to a primary visual cue, like a button changing color or a link becoming underlined. This ensures people who are deaf, hard of hearing, or simply have their sound muted can still understand what’s happening.
The most important accessibility feature you can add is giving the user full control. A non-negotiable best practice is to include a simple, easy-to-find toggle that mutes all site sounds.
This is about respecting your audience. Someone browsing in a quiet library or a person with sensory sensitivities shouldn't be ambushed by unexpected noises. A mute button isn't just a nice-to-have; it's a fundamental part of inclusive and considerate design.
Making sure your site works for everyone is a huge topic. Following a good website accessibility checklist can help you audit your interactive elements and catch issues you might have missed. True accessibility isn’t just about adding features—it’s about giving users the control they need.
Troubleshooting Common Hover Sound Issues
So you've followed all the steps to add a sound on hover effect, but it's just not working right. It’s a classic developer frustration—you hit a snag where the audio lags, loops when it shouldn't, or simply refuses to play. I've spent plenty of hours debugging these exact issues, and it almost always comes down to a simple problem with either timing or logic.
When the sound plays a fraction of a second too late or doesn't know when to stop, it can make an otherwise polished site feel clunky and cheapen the user experience you worked so hard to create. Let's dig into the most common pitfalls and get them sorted out.
Fixing Audio Lag and Delay
One of the most frequent complaints I hear is about a noticeable delay. The user's mouse is already on the button, but the click or swoosh sound arrives just a moment too late, completely undermining the effect of instant feedback.
Nine times out of ten, the culprit is loading time. The browser only starts fetching the audio file the very first time it's triggered, which creates that initial, jarring lag. The solution is to tell the browser to grab the sound file ahead of time.
If you're coding it yourself, the fix is a simple HTML attribute. Just add
preload="auto"to your<audio>tag. This instructs the browser to download the audio as soon as the page loads, so it’s ready to play instantly.If you're using Bubble, its asset loading is usually pretty efficient. But if you’re still noticing a delay, the best thing you can do is make sure your audio file is as small as possible. A highly compressed, tiny file will always load faster.
Stopping Unwanted Sound Loops
Here’s another one that drives people crazy: a sound that keeps right on playing after the user moves their mouse away. Even worse is when the sounds start overlapping into an echoing mess as you quickly mouse over a few different buttons. This happens when you have a play trigger but forgot to add a corresponding stop trigger.
To fix this, you have to be very explicit about telling the audio when to stop.
The rule is simple: for every "on hover" action that plays a sound, you need a corresponding "on hover exit" action that stops it. In JavaScript, this means using the
mouseleaveevent to pause the audio and reset its time. In Bubble, you'll create a second workflow for "when this element is not hovered" that uses the "Stop an Audio Player" action.
This two-part logic is the key to a clean, professional-sounding interaction. It makes sure every hover effect is a complete, self-contained event.
Mobile and Cross-Browser Glitches
Finally, it's easy to forget that "hover" is a desktop-only concept. It simply doesn't exist on mobile devices. Your slick hover sound needs a fallback to work on touchscreens. The standard approach here is to tie the sound to the 'on tap' or 'on click' event instead. It provides that same satisfying feedback, just for a different user action.
If you're running into issues on specific browsers, the problem is often the audio format itself. While MP3 is almost universally supported, some browsers can be finicky. I've found that providing an OGG version as a fallback usually solves any compatibility headaches.
These kinds of hover effects are more than just a novelty; they've become a cornerstone of modern web design, turning simple cursor movements into engaging micro-interactions. In fact, thoughtful micro-interactions can boost time spent on a website by up to 9% and have been shown to drive 20% higher retention in apps.
For no-code builders, implementing these details is what separates an amateur project from a professional one, especially when prototyping an app in a tool like Bubble.io. As you can find out at Thrillxdesign, these seemingly small design choices can have a real impact on your bottom line.
Frequently Asked Questions About Sound on Hover
Once you get your hover sounds working, a few other questions inevitably come up. Thinking through these details is just as crucial as getting the code or no-code setup right. Let’s walk through the most common ones I hear from builders.
Does Adding Sound on Hover Affect My SEO?
This is usually the first thing people ask. Will adding audio to my site tank my Google rankings?
The short answer is no, not directly. Search engines don’t listen to your audio files to rank your page. The real issue is the indirect impact. If you use large, uncompressed audio files, your page will load slower. Since site speed is a huge ranking factor, a sloppy implementation can absolutely hurt your SEO.
But here's the other side of that coin: a well-done hover sound can make your site feel more responsive and engaging. This often leads to visitors sticking around longer and bouncing less, which are strong positive signals to Google. It tells the search engine that people find your site valuable.
So, what’s the takeaway? As long as you keep your audio files lightweight and give users an easy way to mute everything, the boost in user experience is more likely to help your SEO than harm it. It's all about a thoughtful approach.
Where Can I Find Good Audio Clips for Hover Effects?
You definitely don’t need to be a sound engineer to find great audio. There are some fantastic, and often free, resources out there.
Royalty-Free Libraries: I usually start with sites like Mixkit, Pixabay Audio, and ZapSplat. Just search for terms like “UI click,” “interface pop,” or “swoosh,” and you'll find thousands of great options ready to use.
Custom Sound Design: If you're building a brand and want a truly unique feel, consider hiring a sound designer from a freelance platform. This is a great way to create a sonic identity that makes your website instantly recognizable.
Whatever you choose, remember the goal is subtle feedback, not a jarring interruption. Look for clips that are short, crisp, and high-quality. You want a pleasant little confirmation, not an annoying distraction.
How Should Sound on Hover Work on Mobile Devices?
This is a critical point because "hover" doesn't exist on a touchscreen. You can't just ignore mobile users; you have to adapt the interaction.
The best practice here is to tie the audio feedback to the ‘tap’ or ‘touch’ event instead.
Think about it this way: on a phone, a button would play its sound the moment a user’s finger makes contact. This provides the exact same kind of immediate feedback as a desktop hover, but it's tailored to the way people actually use their devices. And just like on desktop, always give your mobile users an obvious and accessible way to mute all site sounds.
Feeling stuck with your Bubble.io build? At Codeless Coach, I offer one-on-one tutoring sessions to help you break through technical roadblocks and build your app faster. Skip the endless forum searches and get direct, expert answers to your toughest questions at https://codeless.coach.


