Mar 25, 2026
How to Build an App Without Coding A Practical Guide
Learn how to build an app without coding. This guide offers actionable steps for non-technical founders to launch an app using no-code tools like Bubble.
So, you have a brilliant app idea but no clue how to code. It's a classic founder frustration, one that used to stop great ideas dead in their tracks. But that's not the world we live in anymore. You can absolutely build an app without writing a single line of code, thanks to a new breed of visual development tools.
These aren't just website builders; they are powerful platforms that let you design, build, and launch fully functional applications using intuitive drag-and-drop interfaces. It's about turning your vision into a real, working product yourself.
The Reality of Building an App Without Code
Let's be clear: this guide is for founders who are ready to get their hands dirty and build, not just dream. The path from a spark of an idea to a product in your users' hands no longer demands a six-figure budget or a team of software engineers.
The myth that you need to hire expensive developers to get your first version out the door is just that—a myth. This isn't about cutting corners; it’s about working smarter. It's about validating your idea, attracting your first customers, and keeping complete control over your product's destiny from day one.
Why No-Code Is Reshaping App Development
The no-code movement isn't just a fleeting trend for hobby projects. It represents a fundamental shift in how software gets made, and it's happening because the tools have become incredibly capable. We're talking about building complex, scalable apps that, until recently, were only possible with traditional, painstaking coding.
The real magic of no-code is the direct line it gives you from idea to execution. Instead of trying to translate your vision to a developer and waiting weeks for them to build it, you are the builder. You can test an idea in the morning and have it live by the afternoon. For a founder, that kind of speed and control is everything.
This isn't just talk; the numbers back it up. Gartner predicts that by 2026, a staggering 70% of new applications developed by businesses will use no-code or low-code technologies. That’s a massive jump from less than 25% just a few years ago. This boom is fueling a market projected to swell from $30.1 billion in 2024 to an incredible $101.7 billion by 2030, largely because it makes development up to 90% faster. The impact of these no-code statistics shows just how significant this change is.
What This Means for Your Startup Idea
If you're a non-technical founder, this shift in technology hands you three critical advantages that can make or break your startup in its crucial early days.
Before we dive into the "how-to," let's quickly summarize why building your app this way is such a game-changer in 2026.
Why Build an App Without Code in 2026?
Benefit | Impact for Your Startup |
|---|---|
Drastic Cost Reduction | Avoid the $50,000 - $150,000+ cost of a custom-coded MVP. Reinvest that capital into marketing and user acquisition. |
Unmatched Speed | Launch in weeks, not months. Start collecting real user feedback while competitors are still in development meetings. |
Total Founder Control | You are the builder. Pivot on a dime, add features based on feedback, and ensure the product perfectly matches your vision. |
Idea Validation | Test your core business assumptions with a real, working product without betting the farm. Fail fast, learn faster. |
Simply put, no-code gives you the power to act on your own ideas, on your own timeline, without asking for permission—or a massive check.
Now, let's explore what that looks like in practice.
Launch at Ludicrous Speed: Forget development cycles that drag on for months. You can build and launch a Minimum Viable Product (MVP) in a matter of weeks. This gets your idea in front of real users fast, so you can learn what works and what doesn't before sinking a ton of time and money into it.
Keep Your Cash: No-code blows the financial doors wide open. Instead of needing tens of thousands of dollars just to get a first version built, you can get started with a low-cost monthly subscription. That cash is much better spent on finding your first customers.
Stay in the Driver's Seat: This is perhaps the biggest win. When you get feedback or have a spark of inspiration, you don't have to write up a spec and wait for a developer. You can jump in and make the change yourself, instantly. The product evolves with your vision, not someone else's interpretation of it.
From Idea to Actionable Blueprint
Every great app starts with a clear plan, not just a flash of inspiration. Before you even think about dragging and dropping a single element in a no-code tool, you need to turn that big idea into a concrete blueprint. Honestly, this disciplined planning is your best defense against the "scope creep" that I've seen sink countless promising projects.
First things first: stop thinking about features. Seriously. Instead, get obsessed with the problem you're solving. What specific pain point are you fixing for a very specific group of people?
A powerful way to nail this down is the Jobs-to-be-Done (JTBD) framework. It’s a simple but profound shift in thinking. Instead of asking, "What features does my user want?" JTBD asks, "What 'job' is my user hiring this app to do?"
For example, with a booking app, the user isn't just "booking an appointment." They're hiring your app to get rid of the back-and-forth email headache, to kill the anxiety of an unconfirmed schedule, and to feel on top of their game. Defining this core "job" becomes your north star for every decision that follows.
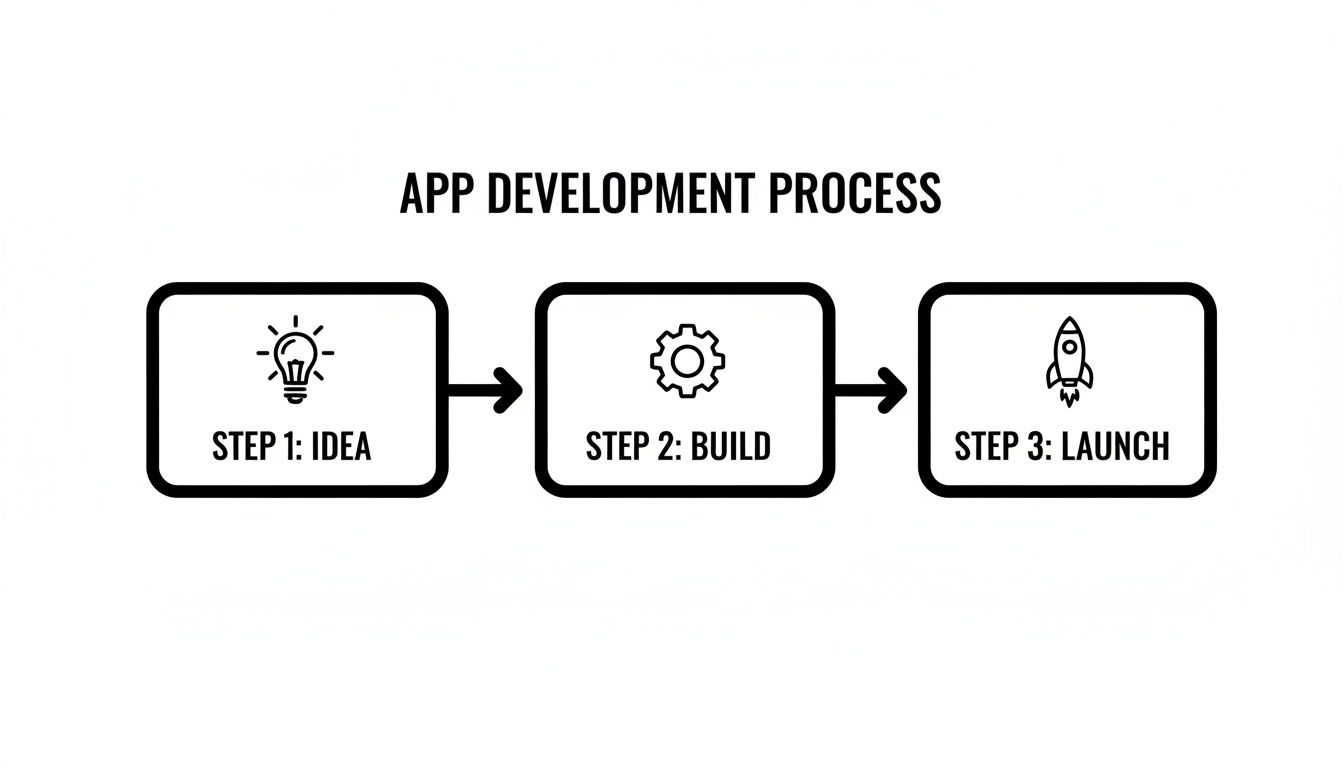
This initial planning stage is the foundation for everything else, as you can see below. Without it, the build gets messy and the launch often falls flat.
Ruthlessly Prioritize Your MVP Features
Once you know the user's "job," you can finally start thinking about features—but with a very sharp knife. Your goal is to define a Minimum Viable Product (MVP). An MVP isn’t a watered-down version of your dream app; it's the absolute leanest version that can successfully do that one core "job" for your user.
This is all about separating the 'must-haves' from the 'nice-to-haves.'
Must-Have: A feature without which the user absolutely cannot complete their main task. For our booking app, this is the ability to see available times and confirm a slot. That's it.
Nice-to-Have: Something that adds a little polish but isn't essential to solving the core problem. Think custom color themes or detailed user profiles.
You have to be brutal here. Every "nice-to-have" you sneak in adds complexity, pushes back your launch date, and muddies the water on your core mission: to prove your idea works. If you're juggling a lot of concepts, an Idea Database can be a great place to park your thoughts and keep things organized.
Map Out the User's Journey
Next, you need to walk in your user's shoes. How will they actually move through your app to get their "job" done? This is where you create a user flow diagram. You don’t need fancy software—a whiteboard, a notebook, or a simple tool like Miro is perfect.
Map out every single step. For that booking app, the flow might look like this:
User lands on the homepage.
User clicks "Sign Up" and creates an account.
User lands on their dashboard and sees a calendar.
User picks a service to see available times.
User clicks a time slot to confirm their booking.
User gets an email confirmation.
This simple exercise is incredibly revealing. It forces you to think logically and almost always uncovers gaps or clunky steps you hadn't considered. This flow becomes the literal instruction manual for what you’re about to build. This kind of detailed planning is the heart of prototyping an app the right way.
This is exactly why the no-code movement is taking off. Gartner predicts that by 2026, a staggering 80% of low-code users will be people in business roles, not traditional IT. With the demand for custom apps growing 5x faster than what IT departments can handle, this trend empowers founders like you to turn a clear plan into a real, working product without anything getting lost in translation.
Choosing Your No-Code Development Platform
Now that you have your app’s blueprint, it's time for what is arguably the most important decision you'll make: choosing your no-code platform. This isn’t just about picking some software; you’re literally selecting the foundation your entire business will be built on. The market is crowded, and each tool has its own personality and purpose.
For example, platforms like Adalo are fantastic for building native mobile apps you can publish directly to the Apple App Store and Google Play. If you just need a simple, slick app that runs off a spreadsheet, Glide is a wonder—it can turn a Google Sheet into a working app in minutes. The trade-off, however, is that this simplicity often comes at the cost of power and long-term scalability.
Why Bubble Is a Top Choice for Web Apps
When founders get serious about building complex, feature-rich web applications, the conversation almost always turns to Bubble.io. Let's be upfront: it isn't the simplest tool out there, and it definitely has a learning curve. But the time you invest in learning it pays off with nearly limitless potential.
Think of it like this: some tools are screwdrivers, perfect for one specific job. Bubble is a full-on power drill with a complete set of attachments. It lets you tackle much, much bigger projects.
You get the fine-grained control needed to build truly sophisticated platforms like social networks, two-sided marketplaces, internal company dashboards, or a full-fledged SaaS product. Its power really comes from three core areas:
A Powerful Visual Editor: You build your app's user interface by dragging and dropping elements onto a canvas. This gives you pixel-perfect control over the entire user experience.
A Complete Database: Unlike many simpler tools, Bubble includes a fully customizable database. You’re not stuck with a rigid structure; you define your own data models to fit your app’s specific needs.
Flexible Workflows: This is where the real magic happens. You create the app's logic with "When this happens... do that" statements. This system is what lets you build just about any feature you can dream up, all without touching a line of code.
This unique combination means you’re never locked into a template. You're handed a powerful set of building blocks to construct your unique vision from the ground up. As you explore the ecosystem, a good guide to no-code automation platforms can also provide a wider perspective.
Key Features That Set Bubble Apart
A couple of specific features really make Bubble stand out for ambitious projects. Understanding them helps clarify why it’s so often worth the initial effort.
First, the API Connector is a total game-changer. It allows your Bubble app to "talk" to almost any other online service. This is how you can integrate payments with Stripe, send text alerts with Twilio, pull in location data from Google Maps, or connect to thousands of other apps through Zapier. Your app is no longer an island; it becomes a connected hub.
Second is Bubble's Responsive Engine. This toolkit gives you precise control over how your app looks and functions on any screen size, from a huge desktop monitor down to a tiny smartphone. In today's world, having a perfectly responsive app isn't a feature—it's a requirement.
When you're deciding on a platform, think about your five-year vision, not just your five-week MVP. A simpler tool might get you to launch faster, but will it support the features you'll need to add in year two? Committing to a more powerful platform like Bubble is an investment in your app's future scalability and your ability to grow without hitting a technical wall.
Ultimately, your project goals should dictate your tool choice. If you want to dig deeper into the options, our guide on the best app builders available today is a great resource.
No-Code Platform Comparison: When to Use What
To help you get a clearer picture, here’s a quick breakdown of some popular platforms and what they’re best suited for. This can help you match your project's scope to the right tool.
Platform | Best For | Key Feature | Learning Curve |
|---|---|---|---|
Bubble.io | Complex, scalable web apps (SaaS, marketplaces) | Total design and database freedom | High |
Adalo | Native mobile apps for app stores | True native components | Medium |
Glide | Simple, data-driven apps from spreadsheets | Speed from sheet to app | Low |
Softr | Client portals & internal tools from Airtable | Seamless Airtable integration | Low |
Choosing a no-code platform is a real commitment. For a simple proof-of-concept or internal tool, a straightforward platform is often the perfect fit. But if you're aiming to build a serious business and need the freedom to scale without limits, investing your time in a powerful platform like Bubble is the most strategic move you can make.
Constructing Your App's Foundation
Alright, you’ve got your plan. Now for the fun part: actually building the thing. This is where your idea starts to take shape on the screen, and it all begins with what I call the app’s brain—its database. That word might sound intimidating, but don't let it fool you.
Forget about servers and complex code. In the no-code world, a database is really just a collection of smart, interconnected spreadsheets. Your job is to decide what information to store and how it all relates. Get this right, and everything else falls into place.

Defining Your Data Structure
In a platform like Bubble, these "spreadsheets" are called Data Types. Think of a Data Type as a noun—a person, place, or thing your app needs to keep track of. For a simple task management app, you'd likely start with these:
User: For anyone who needs to log in and use the app.
Project: To organize tasks under a common goal.
Task: The actual to-do items themselves.
Simple enough, right? Each Data Type then has columns, which Bubble calls Fields. These are the specific details you need to save for each item. Let's look at the "Task" Data Type as an example.
A single "Task" would need Fields like:
Title (Type: text) - The name of the task, e.g., "Design new logo."
Due Date (Type: date) - The deadline for completion.
Status (Type: text, or an Option Set) - Its current stage, like "To-Do," "In Progress," or "Done."
Assigned To (Type: User) - This is the crucial link that connects a Task to a specific User.
Parent Project (Type: Project) - This link connects the Task back to the Project it's part of.
Spending a little extra time here is one of the smartest things you can do. A clean, logical database makes building features a breeze, while a messy one will cause you endless headaches later on.
Designing an Intuitive User Interface
With your data structure in place, you can start building what your users will actually see and touch: the User Interface (UI). Using a drag-and-drop editor, you'll place elements like text, buttons, and input forms onto a blank page.
The goal here isn't just to make it look good; it's to create a User Experience (UX) that feels obvious and easy. A great UX guides people through your app without them having to think about it.
One of the biggest rookie mistakes I see is a cluttered interface. Founders get excited and try to show everything at once, which just overwhelms the user. Your best bet is always a clean, focused layout. Guide the user from one step to the next, one screen at a time.
A non-negotiable piece of modern UI design is responsiveness. Your app has to look and feel great everywhere, from a huge desktop monitor down to a tiny phone screen. Bubble’s responsive engine is powerful, letting you group elements and set rules for how they should stack or resize based on the screen's width.
For example, you can set a row of three feature boxes to automatically stack into a single vertical column on a mobile device. It takes some practice, but getting your responsive settings right is what separates an amateur app from a professional one.
Connecting the Front-End to the Back-End
This is where the magic really happens. You've built the "brain" (your database) and the "face" (your UI). Now it's time to wire them together so they can talk to each other.
This connection happens when you tell your visual elements what data to show. For instance, on a user's main dashboard, you’d probably use a "Repeating Group" element—it's a special container made for displaying lists of things from your database.
You'd set up that Repeating Group with a bit of simple logic:
Type of content: Set this to
Task.Data source: Tell it to
Search for Tasks, but add a rule (a constraint) whereAssigned To = Current User.
Just like that, the list automatically fills with only the tasks assigned to the person who is logged in. Inside each row of that list, you'd add text elements and tell them to show the Current cell's Task's Title and Current cell's Task's Due Date.
This is the core concept of building an app without code. You're visually drawing connections between your design and your data, creating a fully interactive experience without writing a single line of traditional programming.
Making Your App Interactive with Workflows
If your database is the app’s brain and the UI is its face, then workflows are the central nervous system connecting everything. This is where your app stops being a set of static screens and truly comes to life—a dynamic tool that responds to every click and keystroke.
In a platform like Bubble, we manage this logic through Workflows. The easiest way to think about them is as a series of simple but powerful rules: "When this happens, do that." Every time a user interacts with your app, you create a workflow that tells it exactly what to do next.

Building Essential Functions with Workflows
Let's bring this down to earth. You absolutely do not need to be a programmer to build workflows. If you can map out a logical sequence of events on a whiteboard, you have what it takes.
Consider one of the most fundamental features of any app: signing up a new user. What actually needs to happen?
The Trigger: A user clicks the "Sign Up" button.
The Actions:
Bubble grabs the information from the email and password input fields.
It then runs the "Sign the user up" action, which creates a new User record in the database.
Finally, it navigates the new user to their personal dashboard page.
That's it. You’ve just built a complete user registration process. In Bubble, you do this visually by selecting a trigger (the button click) and then adding action steps one by one from a simple dropdown menu.
This same "When/Do" logic applies to pretty much any feature you can dream up.
Let's try another one: creating a new blog post.
Imagine you have a blogging feature. The workflow for a writer to publish a new post would look something like this:
Trigger: The "Publish" button is clicked.
Action 1: The app creates a new thing in the
Blog Postdata type.Action 2: It then populates the fields for that new post—the
Titlefield gets its data from the "Title Input," theContentcomes from the "Rich Text Editor," and theAuthoris set to theCurrent User.Action 3: You'll probably want to reset the inputs so the form is clear for the next post.
Action 4: Finally, you might show a success message like, "Your post has been published!"
By chaining these simple, plain-English actions together, you can build incredibly sophisticated features step-by-step.
Expanding Your App with Integrations
Getting your core features working is a huge milestone, but modern apps rarely exist in a silo. To create a truly powerful solution, you need your app to talk to other services. This is done through APIs (Application Programming Interfaces), and no-code tools make this surprisingly accessible.
Think of an API as a restaurant menu for another company's service. You don't need to know how their kitchen works; you just need to know what you can order and how to ask for it.
An app's ability to integrate with other platforms is what separates a simple tool from a scalable business. You don't need to reinvent the wheel for payments or notifications; you can simply plug into best-in-class services that already exist.
Connecting to Essential Third-Party Services
Let's look at three common integrations that will completely change what your no-code app can do.
Processing Payments with Stripe: Instead of trying to build a secure payment system from scratch (a massive and risky job), you can integrate Stripe. A workflow in your app can send the price and product details to Stripe, which then handles the entire secure transaction. Stripe sends a confirmation back to your app, which you can use to trigger another workflow, like "Mark this order as paid."
Sending SMS Notifications with Twilio: Want to send a text alert when a user's appointment is confirmed? You can set up your app to "talk" to Twilio. Your workflow simply tells Twilio the recipient's phone number and the exact message you want to send.
Connecting Everything with Zapier: Think of Zapier as a universal translator for thousands of web apps. A workflow in your app can trigger a "Zap." For example, when a new user signs up, a Zap could automatically add them to a Mailchimp list, create a new row for them in a Google Sheet, and send a Slack notification to your team.
This ability to connect and automate is one of the biggest strengths of building an app without code. If you're curious about how these pieces fit together, you can learn more about what's possible with a modern Bubble app builder and its powerful integration capabilities. This is how you build a real business, not just an app.
Testing, Launching, and Scaling Your MVP
You've built it. The core features are in place, the design is looking sharp, and your no-code MVP is finally feeling real. It’s tempting to just flip the switch and let the world see it, but hold on. The work you do right now, in this final stretch before and immediately after launch, is what makes or breaks most new apps.
This phase is all about disciplined testing, a smart launch, and being ready to learn from your very first users.
Let's start with a practical testing plan. You're a founder, not a QA department, so your system can be simple and effective. Begin by being your own toughest critic. Go through every single user journey you’ve designed, from the moment someone signs up to when they complete the main goal of your app. Does everything work exactly as you intended? No weird glitches or dead ends?
Now, grab a few trusted friends or colleagues. But don't just ask them to "try it out." Give them a specific mission: try to break it. Seriously. Tell them to do everything wrong. Click buttons out of sequence, stuff gibberish into forms, and generally behave in ways you never planned for. They’ll catch the awkward spots and glaring bugs that you're simply too close to the project to see anymore.
From Development to Live
Once you've stamped out the most obvious bugs from your "break-it" sessions, it's time to push your app out into the real world. On a platform like Bubble, this is pretty straightforward, but it's a moment that demands your full attention. You're essentially moving the app from your private workshop (the "development" version) to the public storefront (the "live" version).
This involves a couple of concrete steps:
Getting a custom domain. You'll want a professional address like
www.yourawesomeapp.com. You'll buy this from a domain registrar and then follow Bubble's instructions to point it to their servers.Deploying to live. This is the big red button. Bubble simplifies this down to a few clicks, pushing the version you've been working on to your new live domain.
One last check. Before you tell a soul, open your live URL in a browser and do a final, quick run-through. Make sure everything made the jump correctly.
Hitting that deploy button for the first time is a huge milestone. You've officially built and launched a web application. Take a moment to celebrate that. Now, the real work begins.
The point of launching an MVP isn't to show off a perfect, finished product. It's to start a conversation with the market. Your main job is no longer building; it's learning.
After the Launch: What Next?
The launch isn't the finish line—it’s the starting gun. Your focus now pivots from building to intelligence gathering. Don’t just sit back and hope for feedback; go out and hunt for it.
Email every single person who signs up. A personal, non-automated message works wonders. Ask them why they joined, what problem they’re trying to solve, and what they honestly think of the app so far.
This qualitative feedback is pure gold. But you also need to pair it with the hard data. What are people actually doing inside your app? Are they using that core feature you spent weeks on, or are they getting stuck somewhere and leaving? Most no-code platforms have built-in analytics or can integrate with tools like Mixpanel to give you these answers.
This data-driven approach helps you avoid the most common post-launch pitfall: building more features based on assumptions. By combining real user conversations with behavioral analytics, you create a powerful feedback loop. This cycle of build, measure, learn is the engine that will turn your simple MVP into a product people can't live without.
Building a fully functional app by yourself is a massive undertaking, and it's completely normal to get stuck. If you want hands-on guidance to move faster on Bubble, Codeless Coach offers one-on-one tutoring sessions designed to help you build, launch, and scale your app. Get personalized help at https://codeless.coach.


