Mar 6, 2026
How to Build a Web Application Without Code in 2026
Learn how to build a web application from scratch with this no-code guide. We cover everything from MVP planning and design to launching your app on Bubble.
So you want to build a web application. The process can feel overwhelming, especially if you’re not a programmer. For a long time, the only options were to hire an expensive development agency or spend years learning to code yourself.
But that’s not the world we live in anymore.
Thanks to powerful no-code platforms, you can now build a sophisticated web app without writing a single line of code. We’re talking about launching in weeks, not years. This guide is the roadmap I wish I'd had, showing you exactly how to get from a rough idea to a live product.
Your Roadmap From Idea to Live Application
Let’s be honest: taking that first step is often the hardest part. The good news is that the entire journey, from concept to launch, can be broken down into a few core stages. We'll be focusing on building with Bubble, a platform designed for founders and creators who need to move fast.
Here’s a simple way to think about the process, which we’ll unpack throughout this guide.
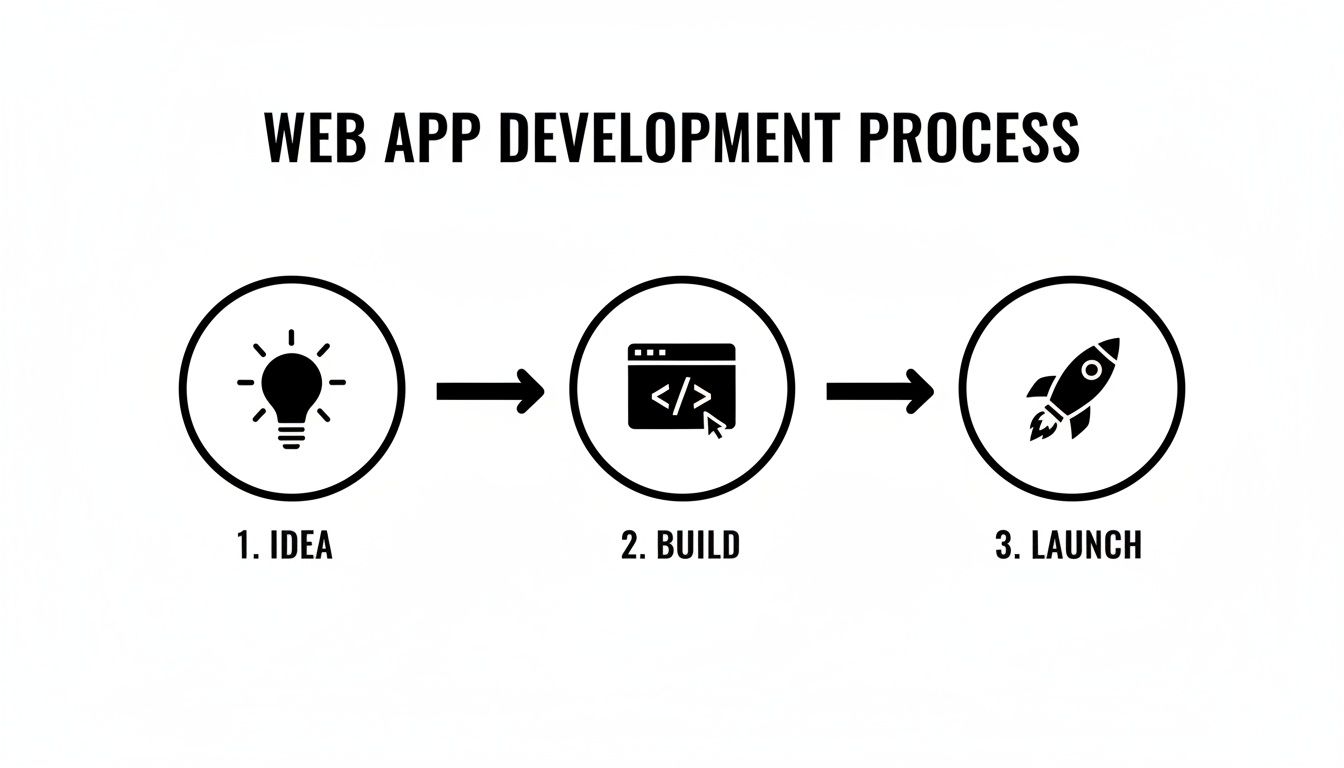
It really does start with a solid idea. From there, you move into the build phase, and finally, you launch. The real work is in the details of each step, and that’s what we’re here to help with.
From a Spark of an Idea to a Real Product
We’ll guide you through turning that initial concept into a fully functional product people will actually use.
Here’s a glimpse of what you'll learn to do:
Scope your idea into a lean Minimum Viable Product (MVP) to avoid building features nobody wants.
Design a clean user interface that looks and works great on any device—desktop, tablet, or phone.
Construct your app's logic using visual workflows that feel like putting puzzle pieces together.
Integrate essential third-party tools like Stripe for payments or Twilio for text messages.
Test, deploy, and iterate on your app after it's live.
The goal isn't just to build an app; it's to build the right app. By focusing on a lean MVP and using the right tools, you can validate your idea in the real world much faster and with way less risk.
Why No-Code Is the New Standard for Founders
The no-code movement isn't just a trend; it's a fundamental change in how software gets made. It puts the power to build directly into the hands of the people who have the vision: the founders, industry experts, and problem-solvers.
Instead of playing a game of telephone with a developer, you have complete control. This direct-to-build approach saves an incredible amount of time and money, but more importantly, it lets you adapt on the fly. You can read more about what makes these tools so effective in our deep dive into no-code platforms.
Ready? Let’s start building. We’ll focus on practical, actionable steps to get you from zero to one.
Resisting the Urge to Build Everything: How to Define Your MVP
I’ve seen countless promising web app ideas die a slow death for one simple reason: the founder tried to build everything at once. It’s a classic trap called feature creep, where a straightforward project slowly bloats into an over-engineered, complex monster that never actually launches.
The secret weapon against this is a ruthlessly defined Minimum Viable Product (MVP).
Don't mistake an MVP for a buggy or incomplete app. It's the exact opposite. It's the most polished, focused version of your product that solves one critical problem for one specific user. This approach lets you validate your core idea with real people before you sink months of effort and cash into the wrong things. If you want a deeper dive, we have a whole guide on what an MVP truly means for your build.
Find Your North Star: The Core Problem
Before you even dream about features, you need to get crystal clear on the single biggest pain point you’re solving. Stop thinking, "I'm building a two-sided marketplace." Start thinking, "My user can't find and book a trustworthy local dog walker."
That one sentence is your north star. From this point on, every single feature idea gets held up against it. Does it directly help the user solve that specific problem? If the answer is no, it doesn’t belong in your MVP.
For our dog-walker marketplace, a user profile is obviously essential. But what about a live GPS tracker to see the dog's exact walking route in real time? That’s a fantastic idea... for version 2.0. The goal of your first launch is to deliver immediate value, not every feature you can imagine.
An MVP is a product, not a project. It has to be viable—someone can actually use it to get a job done. Think of it like this: you want to build a car, but you start by building a functional skateboard. It’s not a car, but it can still get someone from point A to point B. A single tire, on the other hand, is useless by itself.
A Framework for Ruthless Prioritization
Once you have a brain-dump of feature ideas, you need a system to chop them down. Just labeling things "high priority" is too vague and leaves too much room for debate. For non-technical builders, my go-to framework is MoSCoW.
It’s a simple but powerful method that forces you to categorize every potential feature into one of four buckets:
Must-Have: Non-negotiable. The app is fundamentally broken without these. For our dog-walker app, this is user signup, a walker profile, and a way to book a walk.
Should-Have: Important, but not absolutely critical for day one. The app works without them, but they add a ton of value. Think of a simple rating system or a basic in-app messaging feature.
Could-Have: These are the "nice-to-haves" that can easily wait. An integrated calendar sync for walkers would fall into this category.
Won't-Have (This Time): This is the most important list you'll make. It’s where you park all the great ideas you are intentionally not building for the MVP. That live GPS dog-walking tracker? It goes right here. This list is your shield against feature creep.
The MVP Scoping Checklist from Idea to Actionable Plan
To turn all this theory into a concrete plan, a checklist is your best friend. It bridges the gap between your big idea and a blueprint you can actually build from, forcing you to think through the user's journey and the data you’ll need.
Here’s a simple table to walk you through it.
Phase | Key Question | Action Item |
|---|---|---|
Core Problem | What's the single biggest pain my app solves? | Write a one-sentence problem statement. |
Target User | Who exactly am I building this for? | Describe your ideal first user in detail. |
Key Actions | What are the 1-3 things a user must do to solve their problem? | List out the critical steps in the user journey. |
Data Needs | What information does the app need to function? | Define your core data types (e.g., User, Listing, Booking). |
MoSCoW Sort | Which features are absolute Must-Haves for launch? | Categorize every feature idea using the MoSCoW method. |
Working through these steps gives you a focused, actionable scope. This isn't just a planning exercise; this MVP definition will become the foundation for your entire build, guiding your design, database structure, and all the logic you create in Bubble.
Alright, you've successfully wrestled your app idea down to a lean, focused MVP. Now it's time to shift from what your app won't do to what it will do—and, just as importantly, how it's going to look and feel to your very first users.
This is where we tackle two of the most critical pieces of the puzzle: the user interface (UI) and the database. Think of them as the public-facing storefront and the organized stockroom in the back. They have to work together perfectly.
Don't panic. You don't need a design degree or a PhD in computer science. For a founder, the goal isn't to create a museum-worthy masterpiece. It's about clarity and function. A simple, intuitive app that just works on any device will always beat a gorgeous but confusing one.
Crafting a Clean User Experience
You get one shot at a first impression, and it happens fast. We're talking 50 milliseconds—that's all it takes for someone to decide if they like your site. A messy or confusing interface is a surefire way to lose a potential customer before they even see what your app can do. Our goal is the complete opposite: a design so natural that users don't even have to think about it.
The best place to start? Not with fancy design software, but with a pen and paper.
Seriously. Sketch out the basic blueprints for each screen of your app. These "wireframes" aren't about colors or fonts; they're about mapping the user's journey from point A to point B.
Let's go back to our dog-walker app. Your first sketches might look something like this:
Homepage: Big, clear headline about what you do. One obvious button that says "Find a Walker."
Search Results: A simple list of available walkers. Each entry needs a photo, name, and maybe a star rating.
Walker's Profile: All the details for one specific walker. Their bio, what services they offer, and a big "Book Now" button.
Booking Form: Just the essentials—a way to pick a date and time.
Getting this flow down on paper is a crucial step for thinking through the logic before you ever open a tool like Bubble. It’s a core part of building a solid foundation, something we dive into deeper in our guide to prototyping an app.
Embracing Responsive Design from Day One
People will be using your app on everything from a giant desktop monitor to a tiny smartphone screen. If your design looks amazing on your laptop but falls apart on a phone, you're setting yourself up for failure. This is where responsive design saves the day.
The good news is that Bubble's modern responsive engine handles most of the heavy lifting. You build one design, and it cleverly adapts to different screen sizes. You just have to give it the right instructions.
Here are a few principles I always follow:
Think Mobile-First: Always start your design process on the smallest screen. This forces you to be ruthless about what's truly important, leading to a cleaner design overall. It's much easier to add elements for a larger screen than to strip them away for a smaller one.
Group Everything: Bundle related elements into "groups." For example, a user's profile picture and their name should be in a group. This tells Bubble to treat them as a single unit when the screen resizes.
Use Layout Controls: Bubble gives you layout settings like "Row" and "Column." These are your best friends. A row of three icons on a desktop can automatically stack into a single vertical column on a mobile phone.
Building with responsiveness in mind from the very beginning means you deliver a great experience to every single user, no matter what device they're on.
Architecting Your Application's Database
If the UI is the "front of the house," then your database is the impeccably organized "back of the house." It’s the system that holds, manages, and connects every piece of information in your app. Getting this right is arguably the single most important decision you'll make. I've seen more than one project grind to a halt because of a poorly planned database that required a complete, and painful, rebuild.
The easiest way to think about your database is as a collection of smart, interconnected spreadsheets. In Bubble, each "sheet" is called a Data Type, and it represents one of the main "nouns" in your application.
For our dog-walker marketplace, we’d start with these core data types:
User: This holds info for everyone, like their name, email, and a profile picture.
Walker Profile: This is for walker-specific details, such as their bio, services, and hourly rate.
Booking: This captures a single transaction—the date, time, status ("pending" or "confirmed"), and who was involved.
The magic happens when you connect these data types. A 'Booking' isn't just a standalone event; it needs to be linked to the specific 'User' who made it and the specific 'Walker Profile' they hired. This web of connections is what lets you build powerful features, like a dashboard where a user can see all their past bookings.
With traditional coding, this is where you'd face a huge technical decision and have to compare MySQL vs PostgreSQL to pick the right technology. Thankfully, Bubble abstracts all that away. You don't need to worry about the underlying server tech. Your job is to focus on the logic—defining your data types and how they relate to one another. This is the skeleton that will support your entire application.
Building Your App's Logic with Visual Workflows

So far, you’ve designed a sharp user interface and built a solid database structure. Now for the fun part: bringing your app to life. This is where we build the engine under the hood, the logic that makes your app respond and interact with users.
In a platform like Bubble, you won't be staring at lines of code. Instead, you'll be using intuitive visual workflows.
Think of a workflow as a simple instruction: "When this happens, then do that." You define a trigger—like someone clicking a button—and then chain together the series of actions that should follow. This is the core of building an application that actually does things.
For example, almost every app needs a way for users to sign up. Instead of wrestling with backend functions, you just build a workflow: "When a user clicks the 'Sign Up' button... create a new User record, log them in, and then send them to their new dashboard page."
This visual method takes what is often the most intimidating part of development and turns it into a logical, step-by-step process. You're essentially translating your user journey map directly into functional commands.
Common Workflows Every App Needs
Let's get practical. While every app has its unique flavor, I've seen a few core workflows show up in nearly every project. Getting these down will give you a massive head start.
Most of these actions revolve around the acronym CRUD, which is developer-speak for the four essential database operations:
Create: Making a new "thing" in your database, like a new user account, a project task, or a product listing.
Read: Showing data that already exists. When a user browses a list of articles or looks at their own profile, that's a "read" operation.
Update: Changing something that's already in the database. A user editing their bio is a classic "update" workflow.
Delete: Removing a record permanently. Think of a user deleting a comment or an admin pulling a product from the store.
Imagine you're building a simple project management tool. A key workflow would be creating a new task. The trigger is clicking the "Add Task" button. The workflow would then create a new record in your 'Task' data type, grabbing the 'Task Name' and 'Due Date' from the input fields the user just filled out.
Making Your App "Smart" with States and Conditional Logic
A great app doesn't just follow orders; it reacts to different situations. This is where conditional logic and custom states come in. They give your app a brain.
A custom state is like a temporary sticky note you can attach to an element on your page. It holds a small piece of information for a short time without having to write it to the main database. For instance, you could use a state to track which tab is currently active on a settings page. It’s fast and efficient for temporary UI changes.
Conditional logic, on the other hand, lets your workflows make decisions. It's the "only if" part of your "when/then" instructions.
A perfect example is managing user roles. You can build a workflow that says, "When a user clicks 'Delete Project,' only when the Current User's 'Role' is 'Admin', then delete the project." That one simple condition is the firewall that prevents regular users from destroying valuable data.
Here are a few ways you'll find yourself using conditional logic all the time:
Showing or hiding elements: Displaying an "Admin Panel" link in the menu, but only for users with an 'Admin' role.
Changing an element's appearance: Making a "Submit" button gray and unclickable until all the required form fields have been filled in.
Controlling user navigation: Sending a brand-new user to a special onboarding tour, while a returning user goes straight to their dashboard.
This ability to build "if-then" scenarios is what transforms your project from a static page into a dynamic, responsive web application.
Building an Interactive Feature: A Step-by-Step Example
Let's tie this all together with a real feature. Say you want users to be able to "like" a post in a social feed. This is a perfect micro-example of how the UI, database, and workflows all collaborate.
The UI Element: First, you’d add a heart icon inside the repeating cell that displays each post.
The Database Change: Your 'Post' data type needs to track likes. The simplest way is to add a new field called 'Likers' that is a list of Users.
The Workflow: Now, you create a workflow that triggers when the heart icon is clicked. It actually needs two parts: one to "like" and one to "unlike."
The "Like" Action: The first workflow would "Make changes to the Current cell's Post..." by adding the "Current User" to the 'Likers' list.
The "Unlike" Action: You'd have a second, separate workflow on the same icon. This one has a condition: "Only when the Current cell's Post's 'Likers' list already contains the Current User." The action for this workflow is to remove the "Current User" from that same list.
Finally, you add a simple condition to the heart icon itself to change its color—say, from gray to red—only when the post's 'Likers' list contains the current user.
Just like that, you've built a fully interactive feature that gives the user immediate visual feedback while permanently saving their action. This is the essence of building powerful application logic, visually.
5. Integrating Payments and External Services with APIs

Here’s a reality check: your app doesn't have to do everything itself. In fact, the most successful applications are masters of delegation. They connect to specialized services to handle tasks like processing payments or sending emails. These connections are made possible by APIs (Application Programming Interfaces), which are essentially secure bridges that let different software talk to each other.
Instead of spending months building a payment system from the ground up, you can plug into Stripe. Rather than wrestling with email servers, you can connect to SendGrid. This is the smart way to build a feature-rich app without a massive development team. And with a platform like Bubble, many of these powerful integrations are available through pre-built plugins that do most of the heavy lifting for you.
Accepting Payments with Stripe
Let's be honest, getting paid is usually the whole point. For that, Stripe is the undisputed king. It’s secure, reliable, and thankfully, Bubble’s official Stripe plugin makes connecting to it surprisingly simple.
First, you'll need to set up a Stripe account. Once that's done, you just install the plugin inside your Bubble editor and paste in your secret "API keys." Think of these keys as a secure password that proves your app has permission to interact with your Stripe account.
With that connection live, the plugin unlocks a new set of actions you can drop right into your workflows:
Charge the Current User: The go-to action for one-time purchases of products or services.
Subscribe the User to a Plan: Perfect for building recurring revenue with monthly or yearly subscriptions.
Create a Seller Account: Absolutely essential for marketplace apps—like our dog-walker example—where you need to pay your users.
My Tip: Always use Bubble's built-in Stripe plugin for payments. While it's possible to connect directly to the Stripe API, the plugin is expertly maintained, handles complex security requirements like SCA (Strong Customer Authentication), and will save you countless hours of troubleshooting.
Getting the technical details right from the start is critical. Digging into the specifics of a payment gateway API integration will help you build a system that's both secure and dependable.
Sending Automated Emails for Key Actions
Your app needs to communicate with users even when they aren't logged in. This is where transactional emails come in—the automated messages triggered by specific user actions. They're a core part of the user experience.
You've seen them a thousand times:
The friendly welcome email after you sign up.
The instant receipt after you make a purchase.
The password reset link when you’re locked out.
Services like SendGrid or Postmark are built for this. Connecting them to Bubble follows a similar pattern: you add your API keys and then verify your domain to prove you own it (which also helps your emails avoid the spam folder). Once configured, you can use the "Send email" action in any workflow to fire off a professional, branded message.
Using Zapier as a Super-Connector
What happens when you need a service that doesn't have a ready-made Bubble plugin? This is where Zapier becomes your best friend. Zapier is an automation tool that connects over 5,000 different web apps.
Think of it as a universal translator. You can build a "Zap" that listens for a trigger in your app and then causes an action in a completely different one. The possibilities are staggering.
Practical Zapier Use Cases
Trigger (In Your Bubble App) | Action (In Another App) | Result |
|---|---|---|
A new user signs up. | Add a new row to a Google Sheet. | You get an automatically updated list of all your users. |
A customer submits a "Contact Us" form. | Create a new card in Trello. | Your support tasks are instantly organized on a project board. |
A VIP user upgrades their account. | Send a notification to a Slack channel. | Your team can immediately celebrate new high-value customers. |
To get this working, you’ll use Bubble's API Connector to send a "webhook" to Zapier. A webhook is just a simple notification that an event happened. You configure it to send along important data—like the user's name and email—which you can then use in the rest of your Zap. Learning this one technique opens up a whole new world of possibilities for your app.
Testing, Deploying, and Improving Your New Application
You’ve wrestled with workflows, organized your database, and polished the design. It's tempting to think you're at the finish line, but launching isn't the end—it's the beginning of a whole new game. This is where your app moves from a personal project to a real-world product, and it all starts with making it bulletproof.
Before anyone else sees what you've built, you need to become its toughest critic. This is non-negotiable. Putting in the effort here is what separates a smooth launch from a flurry of "it's broken!" emails on day one.
So, how do you do it? Simple: you have to live inside your app. Methodically walk through every single thing a user might do.
Try signing up. Did the account create successfully? Did the welcome email actually land in your inbox?
Go through the core loop. If it's a project management tool, can you create a project, add tasks, and assign them to someone from start to finish without a hitch?
Actively try to break it. What happens when you type letters into a phone number field? Or when you try to submit a form with a required field left blank?
Honestly, just doing this yourself will probably catch 80% of the most glaring bugs and confusing user experience issues.
Getting Ready for a Smooth Launch
Once you’ve ironed out the kinks you can find on your own, it’s time to check for compatibility. People will be accessing your app from all sorts of devices, and it has to work beautifully on all of them. Make sure you test it on the big browsers like Chrome, Safari, and Firefox. More importantly, see how it feels on an iPhone, an Android tablet, and a standard desktop.
Next, you need some fresh eyes. Find a small group of beta testers—and I mean people who actually fit your target user profile, not just your supportive friends and family. Give them a clear task, like "Try to find and book a service for next Saturday," and ask for their brutally honest thoughts. They'll spot confusing layouts and missing features that you've become completely blind to.
The point of beta testing isn't just to hunt for bugs. It's to find out if your app actually delivers on its promise. Can a first-time user figure it out without a manual? Does it truly solve their problem? That's the million-dollar question.
When you're feeling good about the feedback, deploying with a tool like Bubble is refreshingly simple. A few clicks are all it takes to push your development version over to your live website. It's like moving your app from the workshop to the showroom floor.
The Post-Launch Grind: Listen and Iterate
Pop the champagne, you're live! But don't get too comfortable. The real work—and the real learning—starts now. Your first priority is to open a direct line of communication with your users.
This can be as simple as a "Feedback" button inside the app or an email address where people can send suggestions and bug reports. You absolutely need this qualitative feedback to figure out what to build next. This is how your V2 roadmap gets written.
At the same time, you need to look at the numbers. Don't get lost in a sea of data; just set up some basic analytics to answer a few crucial questions:
How many people are signing up each day?
What percentage of them are actually completing the main goal (like making a purchase or posting a comment)?
Where in the process are people getting stuck and giving up?
This constant loop—Build, Launch, Measure, and Learn—is the engine that will drive your app forward. The insights you get from real users are pure gold, telling you exactly what you need to do to make your app more valuable with every single update.
Frequently Asked Questions About Building a Web App
When you're starting your first build, a lot of questions pop up. It’s totally normal. Let's tackle some of the most common ones I hear from founders diving into the world of web applications.
How Much Does It Cost to Build a Web App?
This is the big one, and the answer can be a bit of a "how long is a piece of string?" situation. But the good news is, no-code has completely changed the game.
If you were to hire a traditional development agency, you'd be looking at a starting price tag of $50,000 to $250,000+. With a no-code platform like Bubble, your costs shift dramatically. Instead of a massive upfront development fee, you're looking at a manageable subscription, which can start around $30 per month.
Your primary expenses will really boil down to just a few things:
Platform Subscription: This is for your main workspace where all the magic happens.
Plugin Fees: Some advanced functionalities might need a premium plugin, but you can get far without them.
Domain Name: This is usually a small annual cost, typically around $15 per year.
This model makes it incredibly affordable to get your MVP off the ground, freeing up your cash for what really matters post-launch: marketing and getting user feedback.
The real savings with no-code isn't just money; it's time. Reducing development from months to weeks means you can start validating your idea and generating revenue much faster.
Can I Build a Truly Complex App Without Code?
Absolutely. We've moved far beyond the days when no-code was just for simple landing pages. The power and flexibility of modern platforms are staggering.
I’ve seen founders build incredibly sophisticated applications entirely without code, including things like:
Two-sided marketplaces (think clones of Airbnb or Uber)
Social networks with custom user profiles, activity feeds, and messaging
Complex internal tools for managing business operations
Full-blown SaaS products with tiered pricing and recurring subscriptions
The secret isn't some magic button—it’s about learning to think like a developer and structuring your database and workflows logically. There’s a learning curve, for sure, but the ceiling for what you can build is much higher than most people think. You're not just building a clickable prototype; you're building the real, functional product.
How Long Does It Take to Learn and Build?
This all comes down to your focus and dedication, but the timeline is in weeks, not years. Most founders I work with who are new to this can get the hang of a tool like Bubble and launch a focused, solid MVP within 4-8 weeks.
Compare that to a traditional coding path, and it's not even a contest. The visual, hands-on nature of no-code tools means you learn by doing. You’re not stuck reading theory for months; you’re actively building your app from day one.
Building a web application is a journey, but you don't have to go it alone. If you need hands-on guidance to accelerate your build, Codeless Coach offers one-on-one tutoring to help you overcome hurdles and launch faster. Book a session with me to get expert help on your Bubble project.


