
Mar 19, 2026
A Guide to Better Copy and Paste Buttons in Bubble
Build user-friendly copy and paste buttons in your Bubble app. This guide covers plugins, custom code, and UX best practices for a seamless experience.

It’s one of those small details that makes a huge difference: the humble copy button. With a single click, your user can grab a promo code, a referral link, or any other important text. This simple function is a powerhouse for user experience, preventing manual typing errors and smoothing out friction points that can make an app feel clunky.
Why Better Copy and Paste Buttons Improve Your App

Put yourself in your user's shoes for a moment. They're trying to share a long, complicated affiliate link or maybe enter a unique API key from your app into another system. It's a frustrating process, especially on a mobile device, and it’s practically begging for a typo that leads to a broken link or a failed API call.
As a coach for Bubble developers, I've seen firsthand how overlooking this small feature can create massive headaches. Implementing a seamless copy button isn't just a minor UI polish; it’s a powerful tool that shows you respect your user's time.
Reduce User Friction and Errors
The most immediate win is how drastically it cuts down on user friction. Anytime a user needs to use a piece of information from your app elsewhere—like a tracking number, a generated password, or a meeting ID—forcing them to highlight and copy text manually is awkward.
A well-placed copy and paste button gets rid of that hurdle. One tap, and the information is safely on their clipboard, ready to go. This simple action prevents the inevitable mistakes that come from retyping complex character strings, which means better data integrity for you and fewer support tickets for your team.
The table below highlights some high-impact places where adding a copy button can make a real difference in your app's usability.
Where to Add Copy Buttons for Maximum Impact
Use Case Scenario | User Benefit | Example Implementation |
|---|---|---|
Referral & Promo Codes | Instantly share codes without typos, increasing conversion rates. | A "Copy Code" button next to a displayed discount code in a shopping cart. |
API Keys & Webhooks | Ensures developers can accurately copy credentials to integrate services. | An icon button next to a masked API key in a user's developer settings. |
Shareable Links | Simplifies sharing content, event invitations, or profile pages. | A "Copy Link" button on a user's public profile or a shared document. |
Wallet & Account Numbers | Prevents costly errors when transferring funds or identifying accounts. | A copy icon next to a bank account number or cryptocurrency wallet address. |
Technical Information | Allows easy copying of error logs, server details, or session IDs for support. | A button to "Copy Error Details" within a support modal. |
These are just a few ideas, but they show how a small button can solve a big problem by making your user's workflow smoother and more efficient.
Enhance Professionalism and Trust
Think about the apps you love using. Chances are, they anticipate your needs with thoughtful features like copy buttons for key information. It’s a subtle signal that the app was built with care and a genuine focus on the user's journey.
An app that feels intuitive and helpful is an app that feels more professional and reliable. It’s a quiet but effective way to build trust and keep users coming back.
This is especially true in situations where accuracy is non-negotiable. Providing a copy button for a wallet address in a crypto app or server details in a B2B platform isn't just a nice-to-have; it's a critical feature. It demonstrates that you understand your user's real-world needs. Given that some studies suggest copy-paste can make up up to 80% of data entry in certain business workflows, its importance is hard to overstate. You can read more about the history and impact of this function to appreciate just how fundamental it is to modern computing.
How the Browser Clipboard API Actually Works
Before you can build a copy-paste feature that just works, it helps to understand what's going on behind the scenes. The functionality hinges on the browser's Clipboard API, which acts as a modern, secure gatekeeper between a website and your computer's clipboard.
When you click a copy button, the website isn't just grabbing text on its own. It's making a formal request through this API, and the browser decides whether to grant it. The entire process is deliberately strict, and for good reason: security.
The Importance of User Action
A core principle of the Clipboard API is that it demands a direct user action. A copy command can only be triggered by a specific event, like a click or a tap. This is not an accident; it's a crucial security measure.
This "user-initiated" rule prevents a website from sneakily overwriting your clipboard the second a page loads. Imagine copying a password, visiting a malicious site, and having it silently replaced with a scammer's crypto wallet address. The API is designed to stop exactly that.
This is also a common reason why some copy buttons fail, particularly on mobile devices. If there's a noticeable delay or too many steps between your tap and the actual copy function, the browser might get suspicious and block the request. The link between your action and the API call has to be direct and immediate.
A browser’s primary job is to protect its user. By requiring a direct click, the Clipboard API ensures that you are always in control of what gets copied, preventing websites from overwriting your clipboard with unwanted data behind the scenes.
This security-first design is a huge leap forward from older, less predictable methods.
Old vs. New Clipboard Methods
For a long time, the only way to do this was with a command called document.execCommand('copy'). It was a blunt tool that worked, but it was notoriously inconsistent across browsers and came with some significant security concerns. As a result, it’s now considered deprecated and is no longer recommended.
The modern standard is navigator.clipboard.writeText(). This method is asynchronous, which is a fancy way of saying it runs in the background without freezing up the webpage, making for a much smoother user experience. It also returns a clear success or failure signal, which makes it far easier for developers to show you that handy "Copied!" message or alert you if something went wrong.
If you’re curious about the deeper technical side of things, reading up on API design best practices can shed light on why these systems are built for security and reliability. You won't be building an API from scratch in Bubble, but knowing the principles helps you appreciate why certain plugins and code snippets are structured the way they are.
Sometimes you just need a feature to work, and you need it working fast. While writing your own code gives you ultimate control, diving into plugins is often the quickest way to add a reliable copy-and-paste button to your Bubble app.
Plugins are essentially pre-packaged bits of functionality you can drop right into your project. No code, no fuss.
For this guide, we'll focus on a community favorite: Air Copy to clipboard. It's free, lightweight, and trusted by thousands of Bubble developers, so you know it's a solid choice.

Installing the Plugin
First things first, you need to add the plugin to your app. It only takes a moment.
From your Bubble editor, head over to the Plugins tab in the main left-hand menu. From there, click the + Add plugins button. A new window will pop up—just type "Air Copy to clipboard" into the search bar, find the right one in the list, and hit Install.
That's it. Bubble will handle the rest, and the plugin is ready to use. Once installed, it adds a new "Copy to clipboard" action to your workflow editor, which is exactly what we need.
Setting Up the Copy Workflow
With the plugin installed, let's put it to work. We'll use a common real-world scenario: letting a user copy their unique referral code with a single click.
Start by adding a button or an icon to your page—whatever you want the user to click on. Place it next to the referral code text for a clear visual connection. For our example, we'll use a simple button labeled "Copy Code."
Now, select that button and open the Workflow tab to create a new workflow. The trigger is straightforward:
When Button Copy Code is clicked...
Next, click to add an action. You'll find the new option under Plugins > Copy to clipboard. Selecting this brings up a single, simple field to configure.
Text to copy: This is the heart of the operation. Here, you'll define exactly what content you want to send to the user's clipboard.
This is where the power of Bubble's dynamic data really comes into play. Instead of typing static text, you can pull data directly from your app's database.
For our referral code example, you’d click into the "Text to copy" field and insert the dynamic expression Current User's referral code. Now, any logged-in user who clicks that button will copy their own unique code. It’s this dynamic capability that makes the plugin so useful.
You can apply this same logic to anything in your app—the URL of a blog post, the text from an input field, or a specific ID from a database record. The process is always the same.
And if you're looking for other ways to improve user feedback, consider pairing this with a confirmation message. Our guide on creating a dynamic pop-up button shows you how to build alerts that are perfect for confirming that the text was copied successfully.
Using Custom Code for More Control and Flexibility
Plugins are fantastic for getting a copy button up and running in minutes, but sometimes you just need more control. Maybe you want to sidestep plugin dependencies altogether, show a custom "Copied!" message, or handle specific errors gracefully. That’s where a little bit of custom code comes in, giving you the freedom to build a truly solid solution.
Don't let the word "code" scare you off. We're just going to use a small JavaScript snippet inside a native Bubble HTML element. It’s surprisingly simple to set up and gives you a lightweight, powerful alternative without needing to be a JavaScript guru.
Setting Up the Custom Code Solution
The basic idea is to add a small HTML element to your page, drop a reusable JavaScript function into it, and then call that function from a standard Bubble workflow. It's an efficient way to manage copy actions across your entire app.
Here’s the JavaScript we'll be using. This snippet leverages the modern navigator.clipboard API, which is the current, secure standard for interacting with a user's clipboard.
Just copy and paste this entire block, including the <script> tags, into an HTML element on your Bubble page.
My personal tip: Make the HTML element tiny (1x1 pixel) and place it inside a reusable element, like your site's header. This makes the
copyToClipboardfunction instantly available on any page in your app without cluttering up your UI.
Triggering the Copy Action from Bubble
Once that function is sitting in your reusable header, you can call it from any button or icon on any page. Let's walk through an example where you have a button designed to copy a user's API key.
To get this working, you first need the free and essential "Toolbox" plugin by Mishav. If you don't have it, go grab it—it's a must-have for any serious Bubbler. The "Run javascript" action is what makes this all possible.
Here's how to wire it up:
Select your "Copy API Key" button and open the workflow editor.
Start a new workflow for when the button is clicked.
Add an action and navigate to Plugins > Run javascript.
In the code box, you'll simply call the function we created and feed it the dynamic data you want to copy.
For our API key example, the code you'd enter is:
copyToClipboard("Current User's API Key");
Just be sure to wrap Bubble's dynamic expression in quotation marks. Now, when a user clicks the button, Bubble will execute this JavaScript, find the copyToClipboard function living in your HTML element, and pass the current user's API key right to it. The text is now on their clipboard, and you have full control over the experience.
For more complex needs, like adding custom animations or error messages, an AI assistant like ChatGPT for Coding can be a huge help in generating and refining the exact snippets you need.
Choosing Between a Plugin and Custom Code
So, which approach is right for you? It really comes down to your project's specific needs and your comfort level. A plugin is great for speed, while custom code offers ultimate flexibility.
This table breaks down the key differences to help you decide.
Factor | Plugin Method | Custom Code Method |
|---|---|---|
Speed & Simplicity | Very Fast. Can be set up in minutes with no code. | Slower setup. Requires creating elements and workflows manually. |
Flexibility | Limited. You are restricted to the plugin's built-in features. | Highly Flexible. Full control over user feedback, error handling, and UI. |
Dependencies | High. Relies on a third-party plugin that could break or be abandoned. | Low. Only depends on the "Toolbox" plugin, a Bubble community staple. |
Performance | Generally good, but can add a small amount of "page bloat." | Excellent. A lightweight and efficient native solution. |
Learning Curve | None. Ideal for beginners. | Moderate. Requires some understanding of workflows and dynamic data. |
Ultimately, there’s no single "best" answer. For a quick and simple "copy link" button, a plugin is often the perfect choice. But for a core application feature where you need a more polished and reliable user experience, taking a few extra minutes to set up the custom code method is well worth the effort.
Designing a Better User Experience for Copy Actions
Getting a copy button to work is just the first step. To make your app feel polished and professional, you need to nail the user experience (UX) and user interface (UI) details. These small touches are what separate a clunky app from one that users genuinely enjoy.
The most critical part of any copy action is providing instant visual feedback. You never want your user to click a button and wonder, "Did that actually work?" Without clear confirmation, they might click repeatedly, get frustrated, or just try to copy the text manually—which defeats the whole purpose of the button.
Provide Clear Confirmation
The moment a user clicks, you have to show them the action was successful. This completes the feedback loop and builds confidence in your application.
Here are a few proven ways to do this:
Change the Button Text: A simple and effective method is to switch the button’s label from “Copy” to “Copied!” for a couple of seconds.
Show a Notification or Toast: A small alert that briefly appears (e.g., “Link copied to clipboard”) is another great, non-intrusive option.
Animate the Icon: If you're using an icon, a subtle animation like a quick checkmark appearing provides a nice visual cue without cluttering the interface.
For an extra layer of feedback, especially on mobile, you could even add a subtle vibration. We talk about similar principles in our article on how to add a sound on hover effect; combining actions with sensory cues makes an app feel incredibly responsive.
When deciding how to build this, you'll often face a choice: use a simple plugin for speed or write custom code for flexibility. This flowchart can help you decide which path makes the most sense for your project.
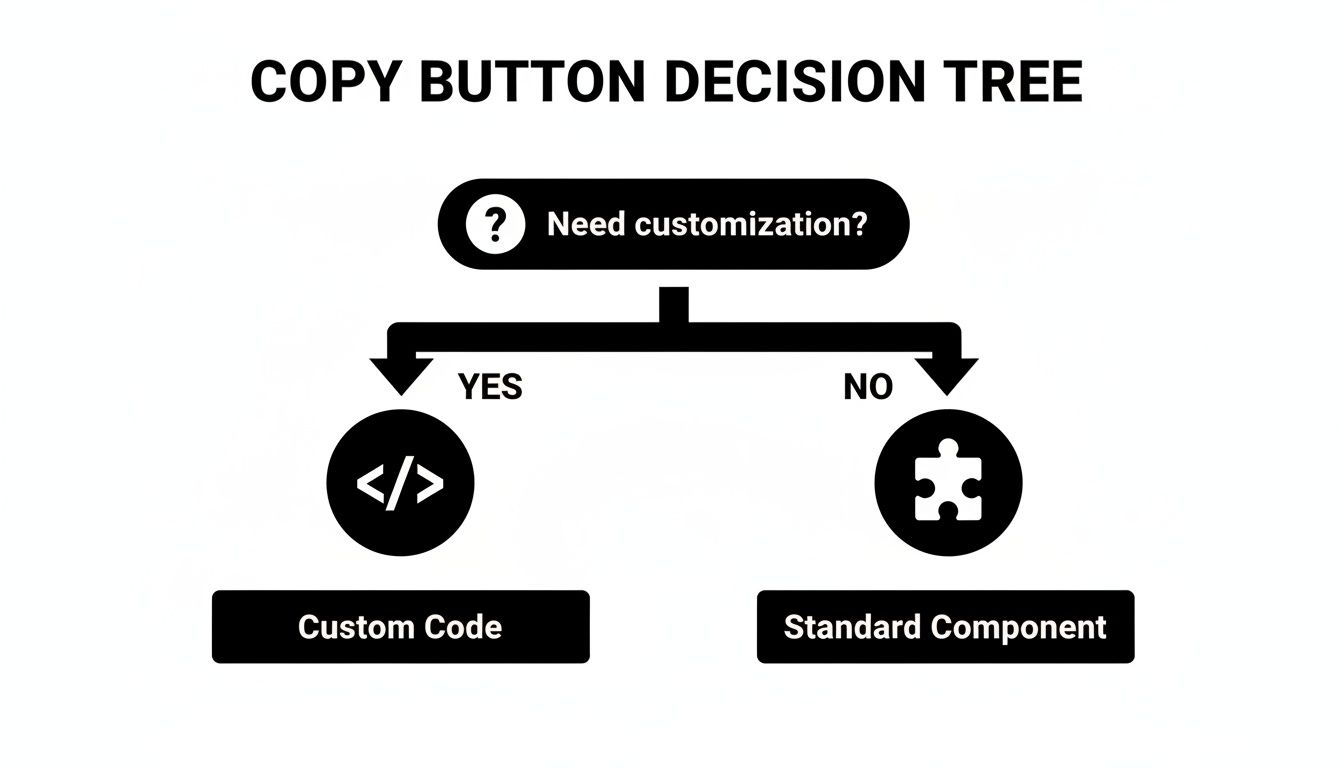
Ultimately, if you just need the basics, a plugin is your fastest route. For a truly tailored experience, though, nothing beats custom code.
Placement and Accessibility
Where you put the copy button matters just as much as how it behaves. The button or icon should always be positioned directly next to the content it’s meant to copy. This close proximity creates an immediate, intuitive connection, so there's no ambiguity for the user.
Placing a copy icon right beside an API key or a referral link is a universally understood design pattern. It requires zero explanation and makes the user's task feel effortless.
This idea of making interactions obvious isn't new. The real breakthrough came back in 1973 at Xerox PARC, when computer scientist Larry Tesler and his colleague Tim Mott developed Gypsy, the first text editor with cut, copy, and paste. Apple later brought this to the masses with the Lisa computer in 1983, standardizing the "Clipboard" and the keyboard shortcuts we all rely on today. It's a fascinating history of the clipboard that truly shaped modern computing.
Common Questions About Copy and Paste Buttons in Bubble
As you start weaving copy and paste buttons into your app, you’re bound to hit a few snags. It’s a rite of passage for Bubble developers, honestly. But knowing what to expect can turn hours of head-scratching into a quick fix.
Let's walk through some of the most common issues I see people run into, with practical solutions I’ve used to solve them time and again.
Why Did My Copy Button Break on Mobile?
This is the big one. I’ve lost count of how many times a developer has told me their copy button works flawlessly on desktop but does absolutely nothing on a phone. 99% of the time, this is a security issue.
Modern mobile browsers, particularly iOS, are incredibly strict. They demand that a copy action is triggered by a direct, uninterrupted user tap. If your workflow has any other steps or even a tiny delay between the tap and the actual copy event, the browser gets suspicious and simply blocks it. This is especially true for older JavaScript methods like execCommand('copy'), which are notoriously flaky on mobile.
The Fix: Your best bet is to use the modern Clipboard API (
navigator.clipboard.writeText()), just like in the custom code example we covered. It’s built for today’s security standards and is far more reliable. And please, always test on a real phone—a browser’s mobile simulator won't always catch this.
Can I Copy an Image or an Entire Group?
While copying text is pretty simple, trying to copy rich content like an image or a whole group of elements is a different ballgame. Bubble’s native functions and most simple plugins just aren’t built for this.
If you need to copy an image, you'll have to find a specialized plugin or dive into some advanced JavaScript that can process the image data into a format the clipboard can actually use.
For copying a Bubble group, the go-to workaround is to create a text-based summary of that group's data. You can generate this text on the fly, place it into a hidden input field on the page, and then have your button copy the contents of that hidden input. It’s a clever way to get the job done.
How Do I Show a 'Copied!' Confirmation?
Good UX means giving users instant feedback. The most straightforward and flexible way to add a "Copied!" message in Bubble is by using a custom state.
Here’s a quick rundown of how to set it up:
Create a custom state on the button element itself. I usually call it
status(typetext) and set its default value toCopy.Update the workflow. Immediately after the copy action runs, add a "Set state" step that changes the button's
statustoCopied!.Use a conditional. On the button's Conditional tab, create a rule:
When this button's status is "Copied!", change its text. I also like to change the background color for a nice visual pop.Reset the button. To make it work again, add a 2-second "Pause" to your workflow, then follow it with another "Set state" action that changes the
statusback toCopy.
For more deep dives and troubleshooting guides, we have a ton of additional Bubble.io help available on our blog.
At Codeless Coach, we're all about helping founders and builders push past roadblocks like these. If you're stuck and could use some personalized, one-on-one help to build faster, feel free to book a session with us over at https://codeless.coach.


